Pentagon = quadrangle + triangle
Hexagon = two quadrangles
Heptagon = two quadrangles + triangle
Octagon = three quadrangles
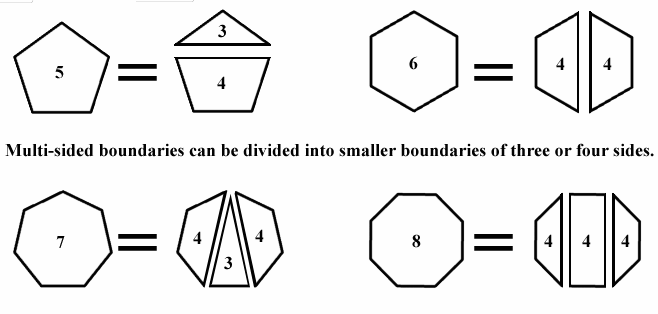
Figure 26
Just as subdivision surfaces won't accept anything other than three- and four-sided polygons, LightWave's Spline Patch operation won't accept anything other than three- and four-sided spline boundaries/patches. We must therefore add splines that break up this six-sided boundary into three- or four-sided boundaries.
Tip: We can find some helpful examples in grade-school geometry, as seen in Figure 26. When breaking up the following forms into the maximum number of quadrangles (four-sided shapes) and the fewest triangles:Pentagon = quadrangle + triangle
Hexagon = two quadrangles
Heptagon = two quadrangles + triangle
Octagon = three quadrangles
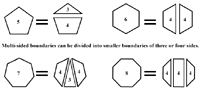
Figure 26
STEP 33: In the Top view, select the "lowest" point of the neck
circle and the "lowest" point of the innermost arm circle (Figure
27). Type Ctrl-p to create a spline. Then select the "topmost"
point of the neck circle and the the "topmost" point of the innermost arm
circle (Figure 28),
and type Ctrl-p to create a spline.
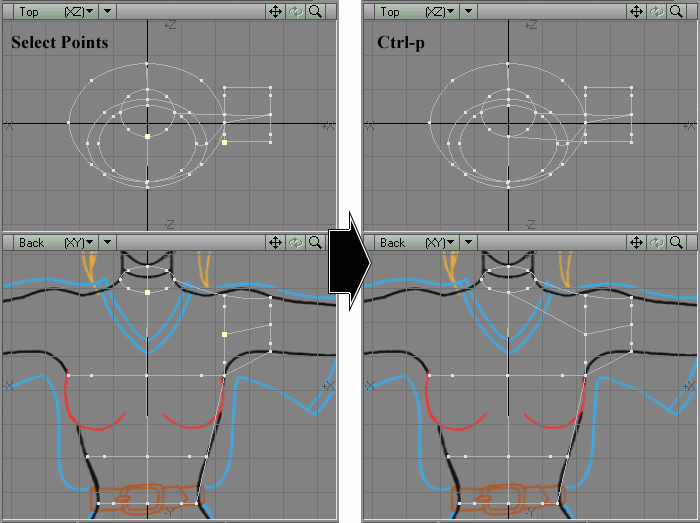
Figure 27 |
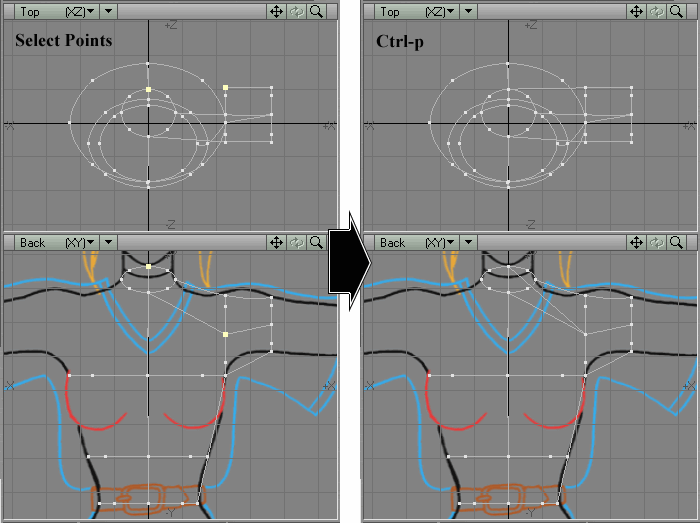
Figure 28 |
Almost there, but some of the splines don't quite match the black lines of the model sheet. We'll fix that in the next step.
STEP 34: In Points Selection Mode, deselect all points. Go to Polygon Selection Mode. In the Back view, select the spline that joins the lowest points of the arm circles. Activate the Add Points tool (if you have not yet added a hotkey for this, you'll find it in Polygon > Revise > Add Points). In the Back view, left-click on the center of the spline. A new point should be added to the center of the spline. Figure 29 demonstrates this procedure.

Figure 29
Tip: I strongly recommend using a hotkey for Add Points. I personally prefer using the hotkey Ctrl-x for Add Points. That way, I can hold my left pinky finger down on the Ctrl key and use my left index finger to type x or t, quickly toggling between Add Points (Ctrl-x) and the Drag tool (Ctrl-t).Warning: Add Points works unpredictably on splines in LightWave 6.5a. If Add Points places the new point too close to another point, you may not be able to Drag the new point without also dragging the other point. If the new point lies too close to another point, type u (Undo) until the new point disappears and try Add Points again -- this time clicking on a slightly different area of the spline.
This bug does not appear in LightWave 6.5b or LightWave 7. (LightWave 6.5a users, take heart -- both you and LightWave 6 users can download the LightWave 6.5b upgrade for free from NewTek's site).
STEP 35: Select the spline that defines the left side of the
torso. (Figure 30)
Right now it is made up of three points, giving it two sections. Add a
point to the middle of each section using Add Points. Use the Drag tool
to move each of these new points until the spline matches the shape of
the black line defining the torso's left side in the model sheet.
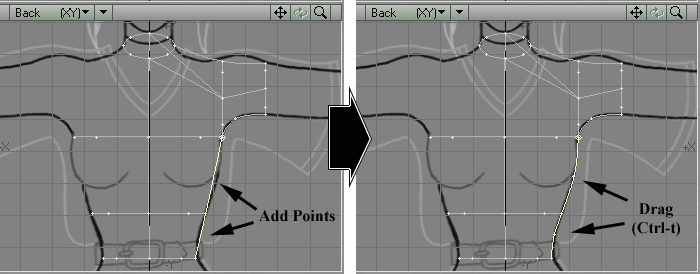
Figure 30 |
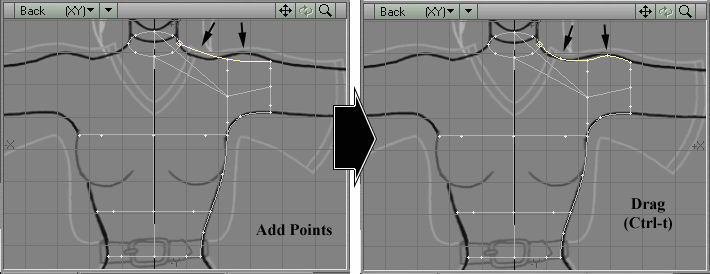
Figure 31 |
STEP 36: Select the spline that defines the top of the left shoulder. (Figure 31) Add a point to the middle of each section using Add Points. Use the Drag tool to move each new point until the spline follows the shape of the black line defining the shoulder.
Tip: In this tutorial, don't worry if the shoulder spline does not perfectly match the drawing. (Figure 31) Pay closer attention to the arcs that each of the splines make in 3D space. The smoother and more rounded the arcs, the better the model will look when finished. You can always tweak the spline cage after it's finished.
STEP 37: Select the other two splines that connect the neck circle to the arm circle. (Figure 32) To leave both of them perfectly straight would mean two odd "creases" in the model's shoulders, because you would have two straight rows of points in the middle of curved rows of points. These two splines need to "go with the flow." Add a point to the center of each spline using Add Points. In the Back View, use the Drag tool to drag the new points downwards, until the curve of these splines complements the downward curve of the shoulder spline.
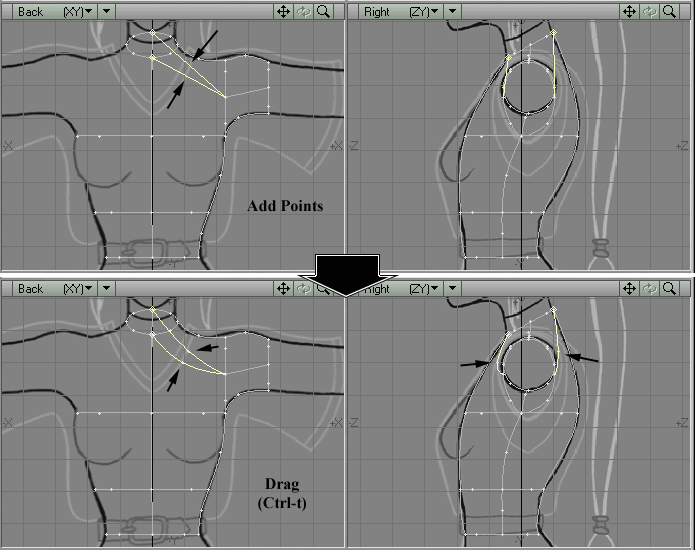
Figure 32
STEP 38: Now it looks good from the Back View, but the Right View suggests that the chest and back of the model will start to cave in towards the middle of these splines. In the Right View, Drag the new point of the front spline slightly towards the negative Z axis. Stop when it appears to lie midway between the edge of the arm circle and the front of the chest. Now to fix the back. Drag the new point of the back splines slightly towards the positive Z axis. Stop after it can be seen outside of the arm circle. It should look like Figure 32.
STEP 39: In the Right View, select the spline that defines the
front of the chest. (Figure
33) Add a point to its lowest section using Add Points.
Use the Drag tool to move this new point until the spline matches the black
line of the model sheet.
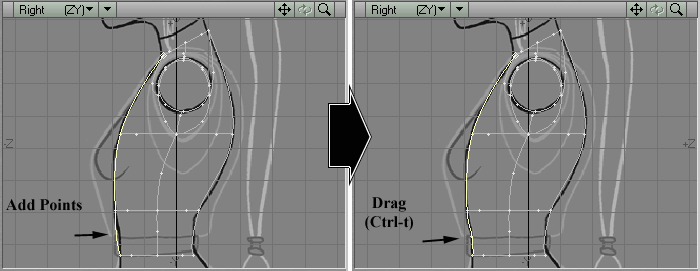
Figure 33 |

Figure 34 |
STEP 40: In the Right View, select the spline that defines the spine. (Figure 34). Add a point to its lowest section using Add Points. Use the Drag tool to move this new pont until the spline follows the black line of the model sheet.
Tip: Because this tutorial will later have you patching this spline cage with 2-by-2 patches, having more than one "tweak point" per section of spline will not matter.
STEP 41: Now for the neck. She could use a longer neck. Deselect
all splines, then select the four splines that form the neck circle. Type
c to Copy this geometry. Just so that it won't accidentally get pasted
on top of the original, go to an empty layer. Then type v to Paste a copy
of the neck circle. Type t to bring up the Move tool. In the Right View,
move the copy of the neck circle up and to the left until it lies inside
the top of the model's neck. (Figure
35) Then type x to Cut the geometry out of this layer. Go
to the original layer, and type v to Paste it.
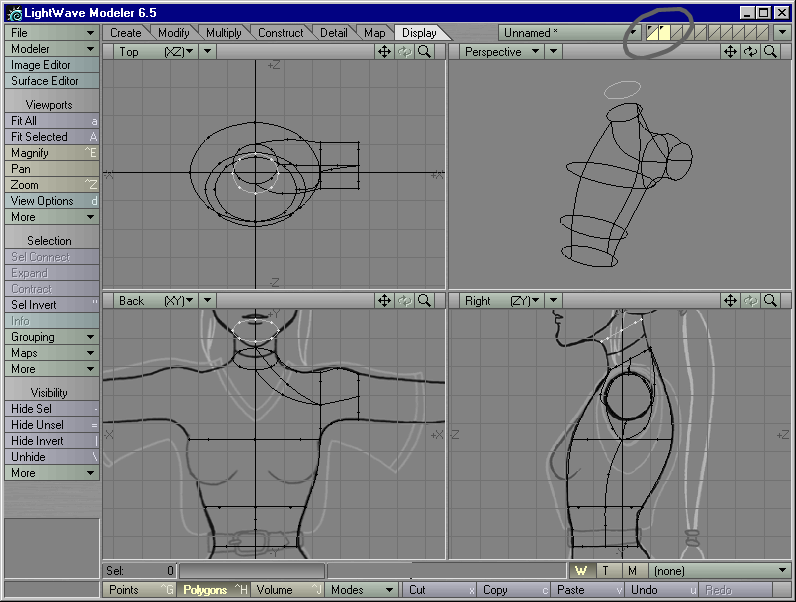
Figure 35 |
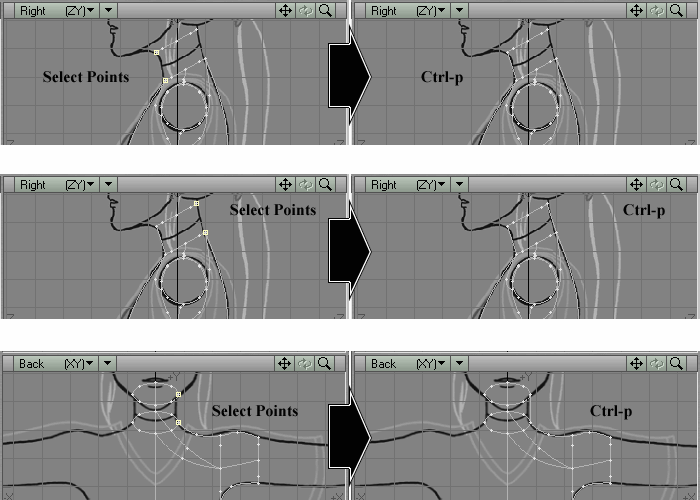
Figure 36 |
STEP 42: Now to connect this neck to the rest of the cage with splines. Enter Points Selection Mode. In the Right View select the "leftmost" point of each neck circle, and type Ctrl-p to create a spline. (Figure 36) Then select the "rightmost" point of each neck circle, and type Ctrl-p to create a spline. Finally, in the Back View, select the "rightmost" points of each neck circle, and type Ctrl-p to create a spline.
STEP 43: That's it. You're done with the upper torso! Save this
object as torso03.lwo (using "Save Object As" in the File menu,
of course). ...now you just need to build the hip section.
| Previous Page | Table of Contents | Next Page |