Figure 37
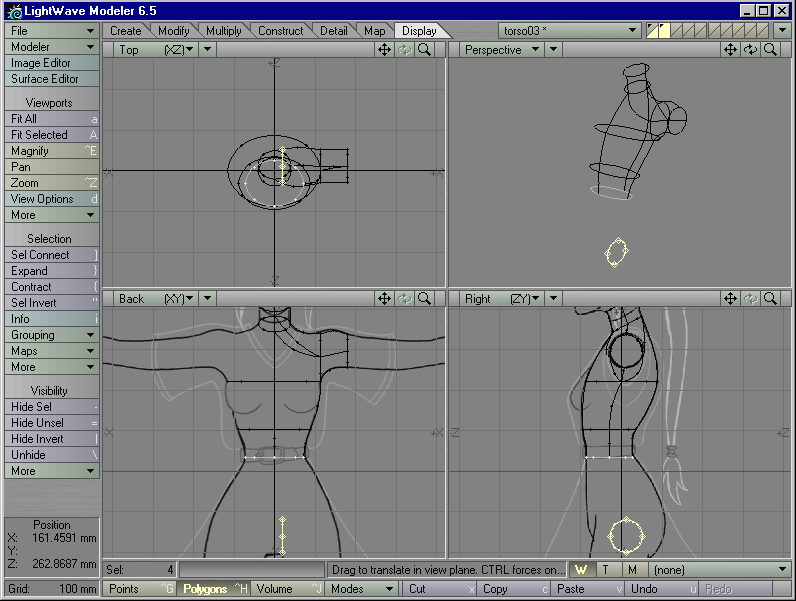
Figure 38
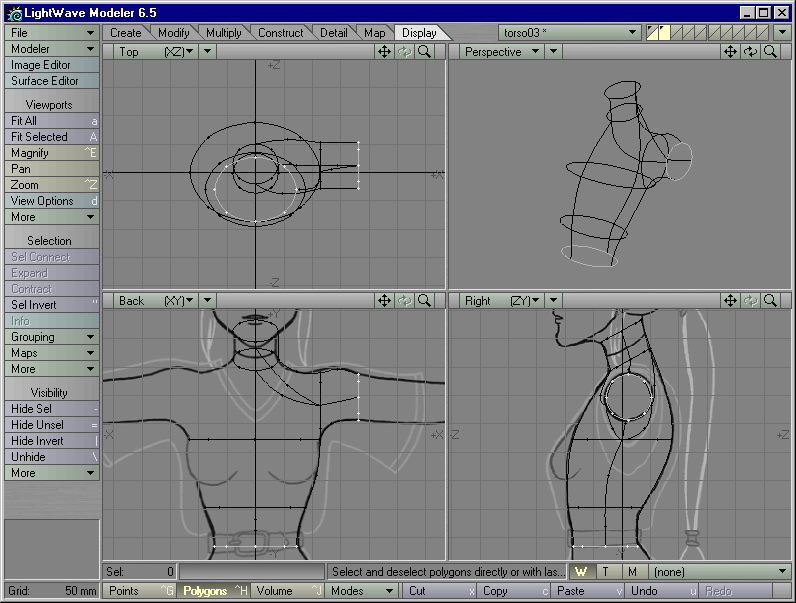
Note: Those who did not complete the previous steps may load torso3.lwo from the CD-ROM.
STEP 44: It'll be easier to work in a new empty layer, but you should first gather some raw materials. The hip connects to the bottom of this torso cage, so we'll need a copy of the spline ellipse that defines the bottom of the torso cage. The outermost arm spline circle is a perfect circle that still lies in an orthogonal plane (unlike the neck circles, which have been Rotated, or the torso circles, which have been Stretched) -- we can use copies of the arm circle to form the leg circles.
Go into Polygon Selection Mode. Deselect all splines. Move the mouse
pointer near the outermost arm circle, and hold down the right mouse button
so that you can use the Lasso. Lasso the outermost arm circle to select
it, letting go of the right mouse button when you're done. Hold down the
Shift key so that you can select additional geometry. Select the four splines
that define the bottom of the torso cage. Type c to Copy this geometry.
Go into a new empty layer and type v to Paste the copied geometry into
the new layer. It should look like Figure
37.
|
Figure 37 |
Figure 38 |
STEP 45: Zoom out a bit so that you can see the legs of the model sheet. Select the arm spline circle. Type Shift-t to bring up the Move tool, and Move the circle underneath the waist spline ellipse until the edge of the arm circle touches the corner of the model sheet's crotch. (Figure 38)
STEP 46: Zoom in to the hip area. Select the arm circle (if it's not selected already). In the Back View, move your mouse pointer over the lowest point of the arm circle, and type r to Rotate the arm circle a perfect 90 degrees to the right.
STEP 47: Type Shift-h to bring up the Size tool (Modify >
Stretch > Size). In the Back View, place the mouse pointer over the
"leftmost" point of the arm circle (which will from now on be referred
to as the "leg" circle). Left-click and drag to the right until the right
edge of the leg circle touches the outermost black line of the model sheet.
(Figure 39)
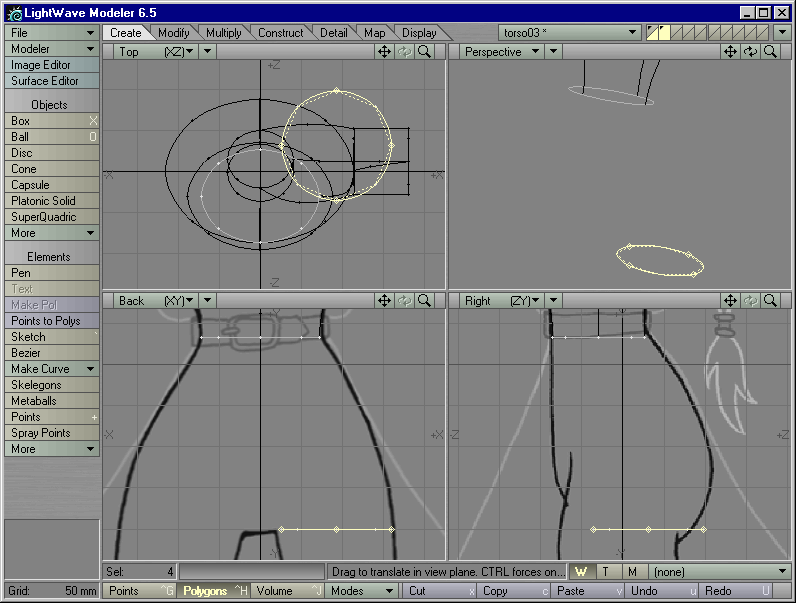
Figure 39 |

Figure 40 |
STEP 48: Type Shift-t to bring up the Move tool. Go to the Right View. Hold down the Ctrl key to restrict movement to one axis, and Move the selected leg circle to the left until it lies between the black lines of the model sheet that define the leg. (Figure 40)
STEP 49: Go to Points Selection Mode. In the Back View, select
the "leftmost" point of the leg circle. Type c to Copy this point, and
v to Paste it. The copy is lying right on top of the original point...but
you have the original selected, not the copy. No problem. Deselect everything,
type w to bring up Point Statistics (Modeler > Windows > Statistics
Open/Close). Click on the "plus" sign next to the text string that
says "0 Polygons." All points in this layer that are not connected to any
polygons at all will be selected. In this case, it'll just be the one point
that you copied and pasted. (Figure
41)
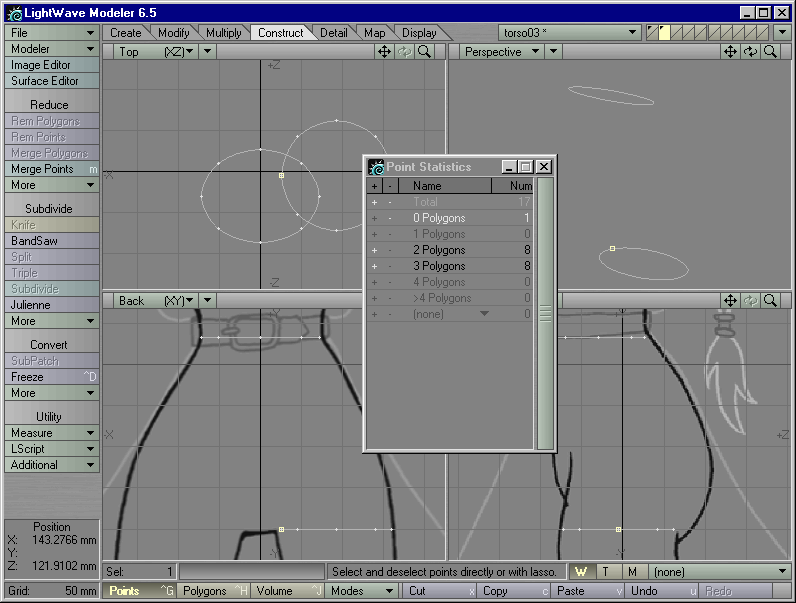
Figure 41 |
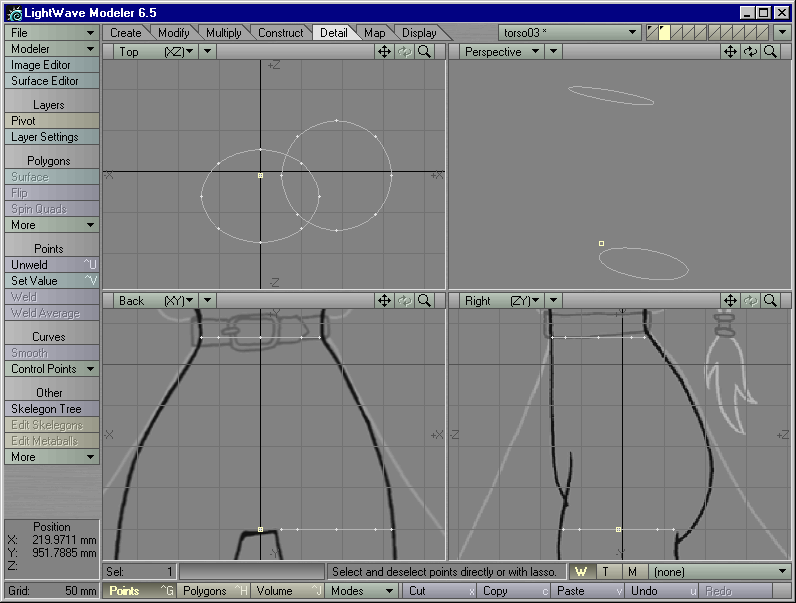
Figure 42 |
STEP 50: With this point selected, type Ctrl-v to bring up the Set Value tool (Detail > Points > Set Value). Set it to 0m on the X axis and click on OK. The point will snap to the X axis. (Figure 42)
STEP 51: Leave this point selected. In the Back View, hold down
the Shift key and select the "leftmost" point of the leg circle again.
Type Ctrl-p to create a spline. (Figure
43)
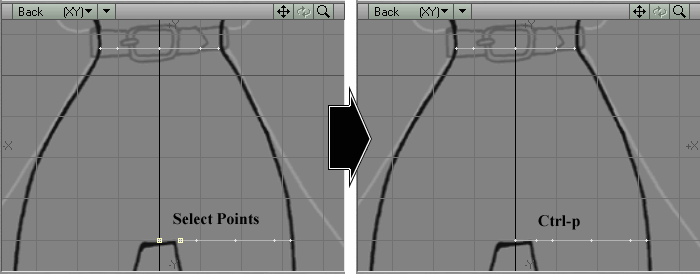
Figure 43 |
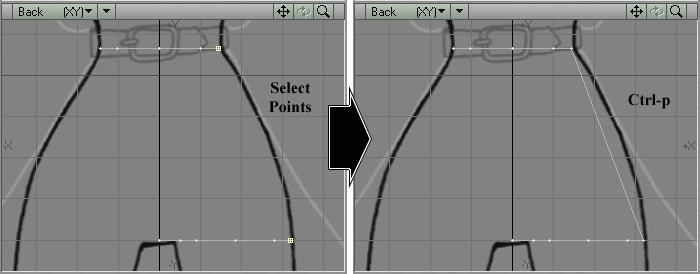
Figure 44 |
STEP 52: In the Back View, select the "rightmost" points of both the waist and leg spline boundaries, and type Ctrl-p to create a spline. (Figure 44)
STEP 53: In the Back View, select the point that defines the
center of the crotch. Then, holding down the Shift key in the Right View,
select the "leftmost" point of the waist spline ellipse. Type Ctrl-p to
create a spline. (Figure
45)
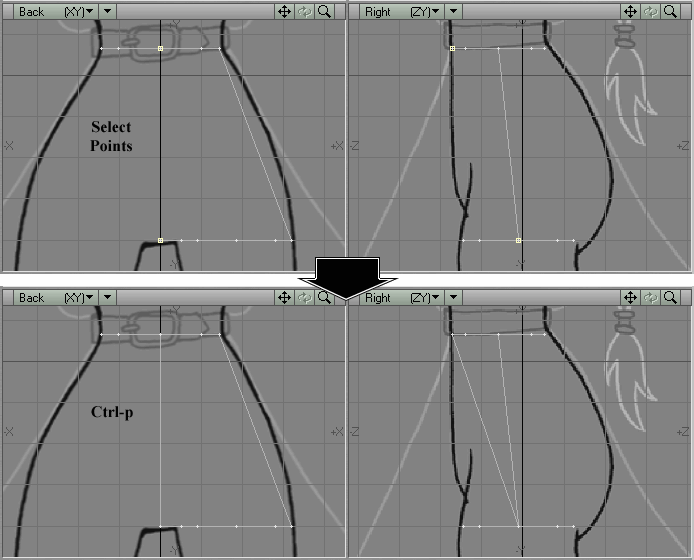
Figure 45 |
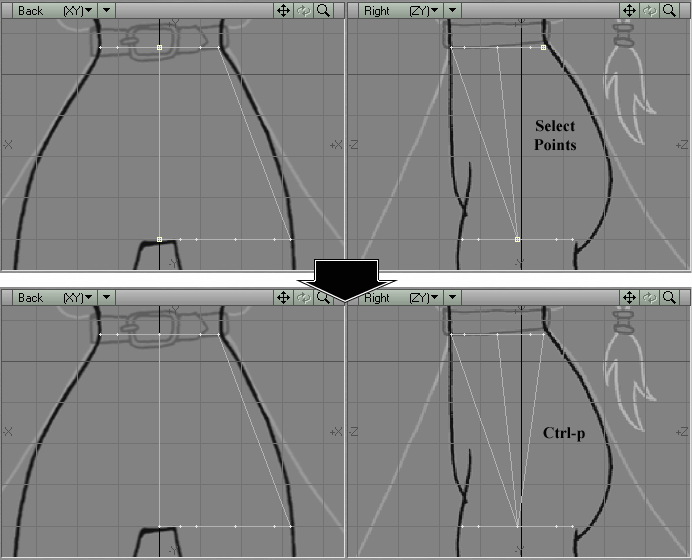
Figure 46 |
STEP 54: Return to the Back View. Again, select the point that defines the center of the crotch. Then, holding down the Shift key in the Right View, select the "rightmost" point of the waist spline ellipse. Type Ctrl-p to create a spline. (Figure 46)
STEP 55: Now we'll get these three splines to better match the
lines drawn on the model sheet. Enter Polygon Selection Mode. In the Right
View, select the "leftmost" of the three new splines. Add three points
to it with the Add Points tool, and use the Drag tool to drag these three
new points until it matches the black line defining the front of the hip
section. (Figure 47)
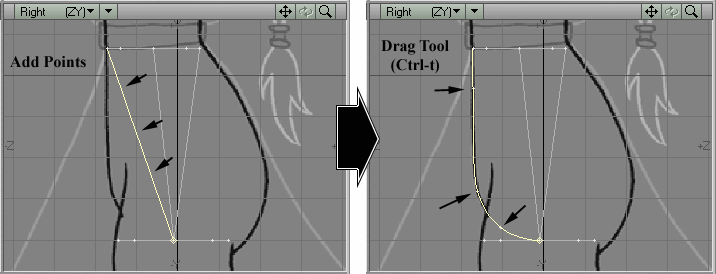
Figure 47 |
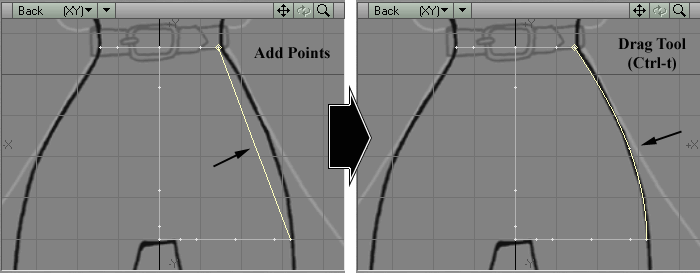
Figure 48 |
STEP 56: In the Back View, select the spline closest to the outside of the hip. Add one point to it with the Add Points tool, and use the Drag tool to drag the new point out until the spline follows the black line defining the outside of the hip. (Figure 48)
STEP 57: In the Right View, select the "rightmost" of the three new splines. Add three points to it with the Add Points tool. Use the Drag tool to drag these new points until the top part of the spline matches the top part of the black line, and the bottom part of the spline forms a nice arc inwards. (Figure 49)
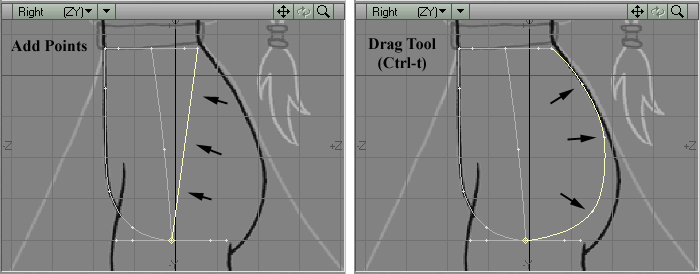
Figure 49
Technical Note: Those who looked at s-torso.lwo earlier might have noticed that this spline forms the entire side of a patch. Since this spline cage will be patched with settings of 2-by-2 with Knots on each patch, the extra two "tweak points" in Step 57 may seem like a waste of geometry. Technically, they are, since for a 2-by-2 operation Knots will use only the points that form the corners and the center tweak point. (If no center tweak point exists, then Knots will treat the center between the two centermost points of the spline border as the center tweak point). The two extra points in Step 57 exist for:
| Previous Page | Table of Contents | Next Page |