Figure 1
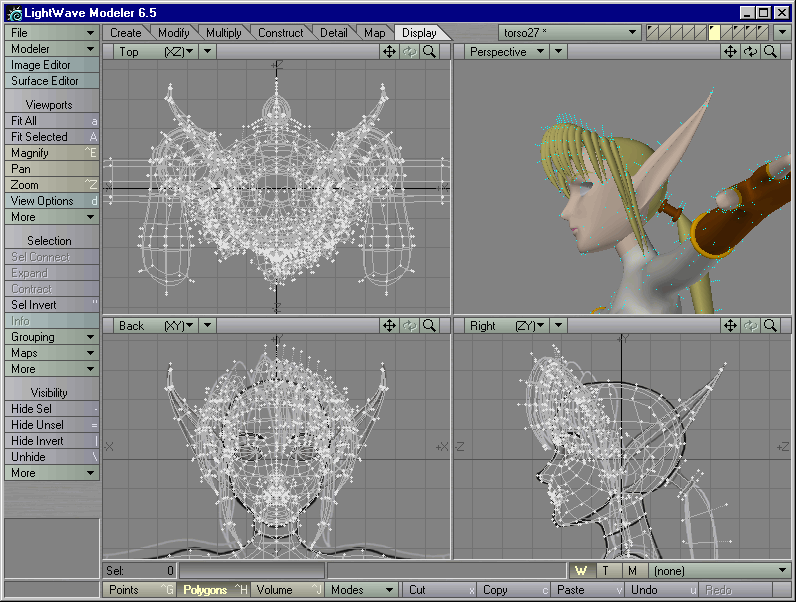
STEP 2: From the drop-down list to the left of the layer buttons, make head13.lwo the current object. Go to the layer containing the head geometry, and make that the only active layer. With nothing selected, type c to Copy everything in that layer. Then make torso27.lwo the current object. Go to the layer containing the body geometry, and make that the only active layer. Type v to Paste a copy of the head geometry into the body layer. (Figure 1)
Figure 1
Because you used the points of the neck to build the spline at the bottom of the head, these meshes should line up with each other, and their points should overlap. A selective Merge Points operation should take care of this. (if not, you can always fall back on Weld).
STEP 3: Hit the Tab key to turn off SubPatch surfaces. Zoom in on the seam where the head meets the neck. Set the Perspective View display type to Wireframe Shade. Because you have separate meshes in this layer that you do not want to make seamless with their surrounding meshes (such as the eye sockets, the mouth interior, the glove piping, and the ponytail holder geometry), you do not want to perform a Merge Points operation on the entire body. Select just those points around the seam (it's OK to select more than the points of the seam, as long as you don't select any points that you don't want Merged, such as the mouth interior), and type m to Merge any overlapping points together.
STEP 4: Eight polygons surround the neck. If Merge Points says "8 points eliminated," you can skip to the next step. (Figure 2) If not, you must Weld each pair of points together yourself. Type the = sign to Hide all unselected points. Zoom in on each pair and Weld them together into single points.
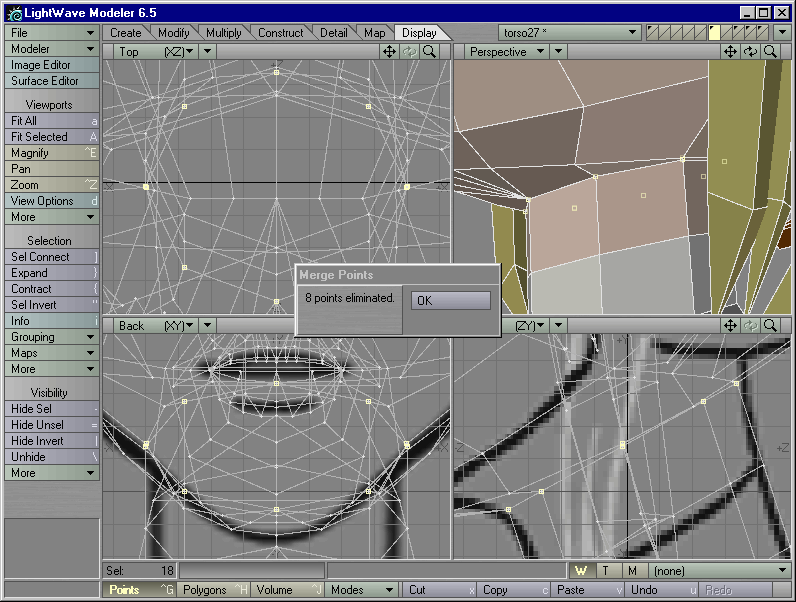
Figure 2
STEP 5: Deselect everything. Hit the Tab key to reactivate SubPatch
Surfaces. The neck and head should now be one seamless mesh. (Figure
3)

Figure 3 |
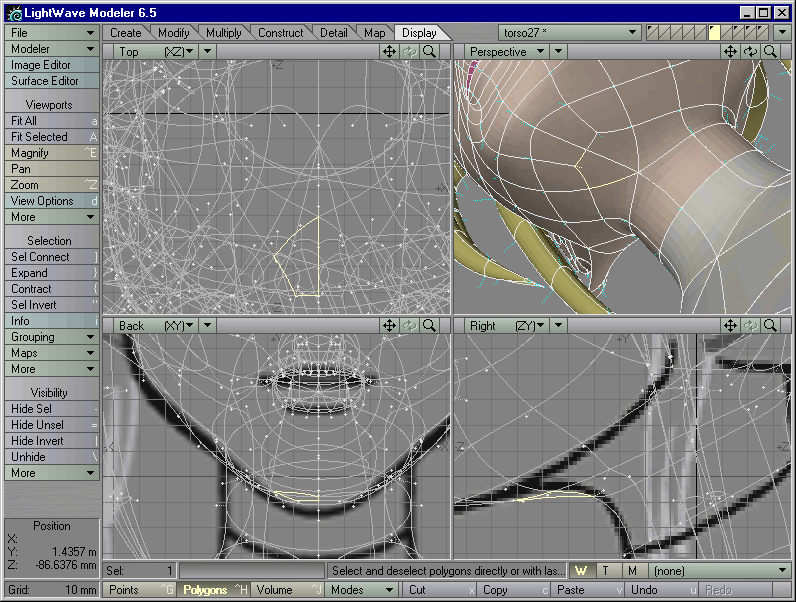
Figure 4 |
STEP 6: As a refinement, Zoom in on the triangles on the underside of the neck. Select each adjacent pair of triangles one at a time and type Shift-z to Merge them into single quad polygons. (Figure 4)
STEP 7: Save this object as kara01.lwo.
STEP 8: If you want the head spline cage to be part of this object, copy it from head13.lwo and Paste it into an empty layer in kara01.lwo. Then save kara01.lwo again.