Figure 1
We can recreate this effect by deliberately burying the ends of the hair tufts into the border between the hair and the face. Not only will the ink lines defining the ends of the tufts get buried, but the hair tufts will block the Surface Border edge of the hairline from view.
When modeling this part of the hair, focus on the overall shape of the hairstyle, rather than the actual number of tufts in the model sheet.In the Back View, this elf-girl has bangs in the rough form of a crown (or the visor of Athena's helmet; take your pick). Make the individual tufts as thick or as thin as you like, but try to keep the mass of the bangs in the shape of a crown.
STEP 1: Load head11.lwo into Modeler. (If you just want to practice modeling bangs, you may load head11.lwo from the CD-ROM).
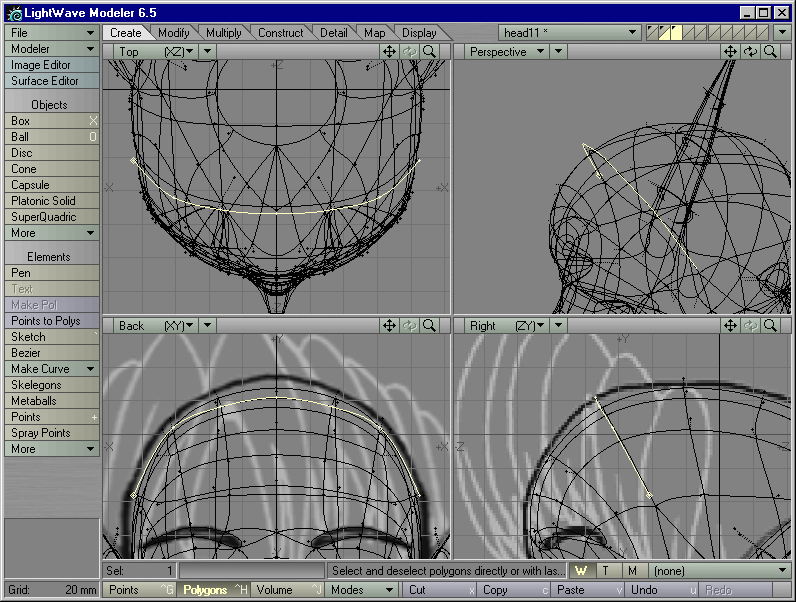
STEP 2: If we are going to obscure the hairline with hair tufts, we could use a guideline for where the hair tufts should lie. Select all of the points that border the hairline from ear to ear, Copy and Paste them to an empty layer. In the Back View, select them from left to right and type Ctrl-p to make a spline out of them. We now have a guideline that traces the hairline of the head. (Figure 1)
Figure 1
STEP 3: Go to a new empty layer, with this spline in the background. Create a Cone aligned with the Y axis, with three sides and four segments. Use these Numeric settings:
    Axis: Y
   Sides: 3
Segments: 4
  Bottom: 1.516m
     Top: 1.6713m
Center X: 0m
       Y: 1.5937m
       Z: -125.0497mm
Radius X: 18.5mm
       Y: 77.5mm
       Z: 18.5mm
STEP 4: In the Right View, Rotate this cone 180 degrees so it points downwards. In the Top View, rotate it until its cross-section points towards the negative side of the Z axis. In the Back View, Move it until its widest end touches the top of the central tuft of hair in the model sheet. In the Right View, Move it until its narrowest end touches the tip of the central tuft of hair in the model sheet. It should look like Figure 2.
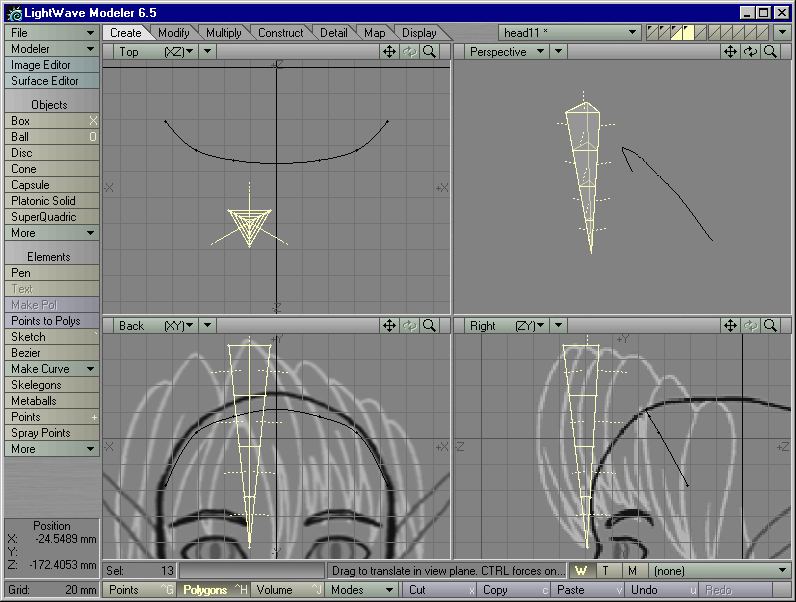
Figure 2 |

Figure 3 |
STEP 5: Knife this geometry slightly above the tip, to keep the tip pointed when converted to SubPatch surfaces. Then hit the Tab key to convert everything into SubPatch surfaces.
STEP 6: Select the three uppermost sections of this SubPatch cage above the tip, and Smooth Scale them outwards until they have the thickness of the hair tufts in the model sheet. (By not Smooth Scaling the tip, you maintain the sharp point of the tip). A Smooth Scale of about 5mm should do it. It should look like Figure 3.
STEP 7: Type [ to activate the Shear tool (Modify > Move >
More > Shear). In the Back View, right-click on the top of this geometry
and drag out the falloff triangle to the bottom of this geometry. Tap the
"up" arrow key on your keyboard until the right curve of the triangle best
matches the curve of the central hair tuft in the model sheet. Then left-click
and drag to the right to curve the geometry into the shape shown in Figure
4.
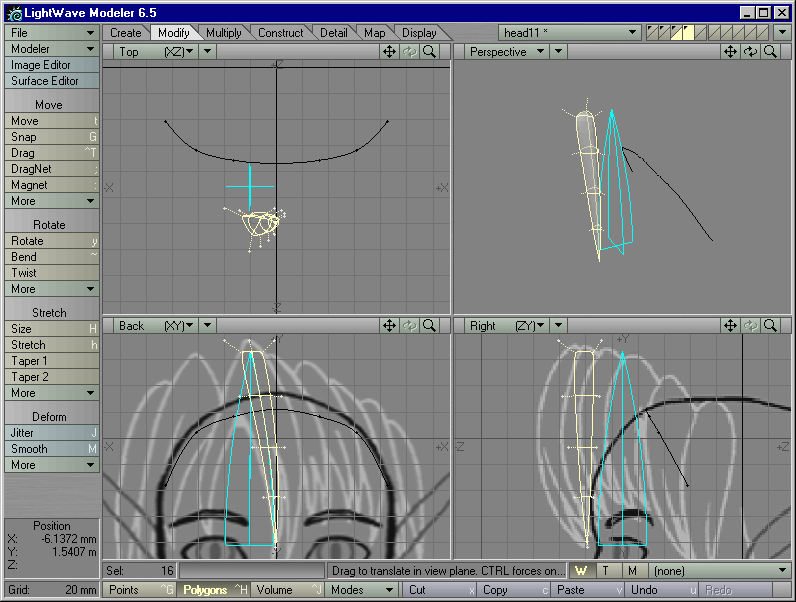
Figure 4 |

Figure 5 |
STEP 8: Leave the Shear tool active. Tap the "right" arrow key on your keyboard until the leftmost curve of the falloff triangle in the Right View best matches the curve of the hair tufts in the Right View. Then, in the Right View, left-click and drag on the geometry until it bows outwards into the shape shown in Figure 5.
STEP 9: Select the topmost SubPatch surface. Activate the Smooth
Shift tool and right-click on the selected geometry. In the Right View,
rotate this SubPatch surface to the right until its points form the top
of an arch, as shown in Figure
6.
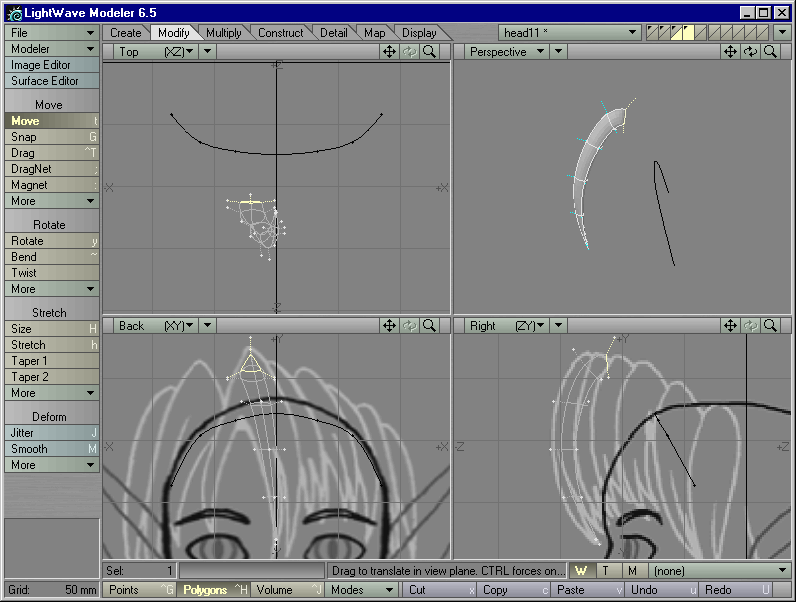
Figure 6 |

Figure 7 |
STEP 10: Smooth Shift the selected polygon again, and use both the Rotate and Move tools to get it to touch the spline guide in the background.
STEP 11: Cut the selected SubPatch surface out of the geometry. The base of the hair tuft should intersect the spline guide in the background (if not, move the points of the hair base until it does). Assign the existing surface name of "Kara Hair" to the entire geometry. It should look like Figure 7.
The end of this hair tuft qualifies as an Unshared Edge. As long as the Unshared Edges box is left unchecked in Layout, we won't have to worry about horizontal ink lines showing up on the face of the elf girl in the event of an Edge Z Scale problem.
Note: Don't fret about the loss of an ink line on all of the "Separate Mesh" polygons (eye socket, eyebrow, glove trim, etc) -- they actually qualify as Surface Border Edges in Layout. For SubPatch geometry, overlapping points get merged after subdivision in Layout.
STEP 12: For future convenience, select the three SubPatch surfaces at the base of this hair tuft and assign the part name of "Kara Bangs (Base)" to them.
STEP 13: If you wish, select the geometry above the tip and Smooth
Scale them outwards slightly to "puff out" the thickness of the hair tuft.
(If you choose to puff out the hair tip as well, you will lose the sharp
point of the hair tip). It will look like Figure
8.
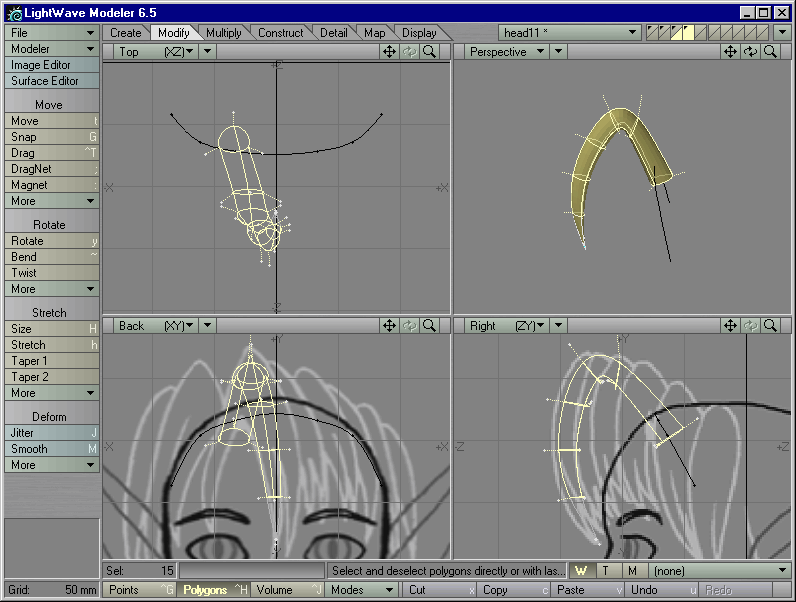
Figure 8 |
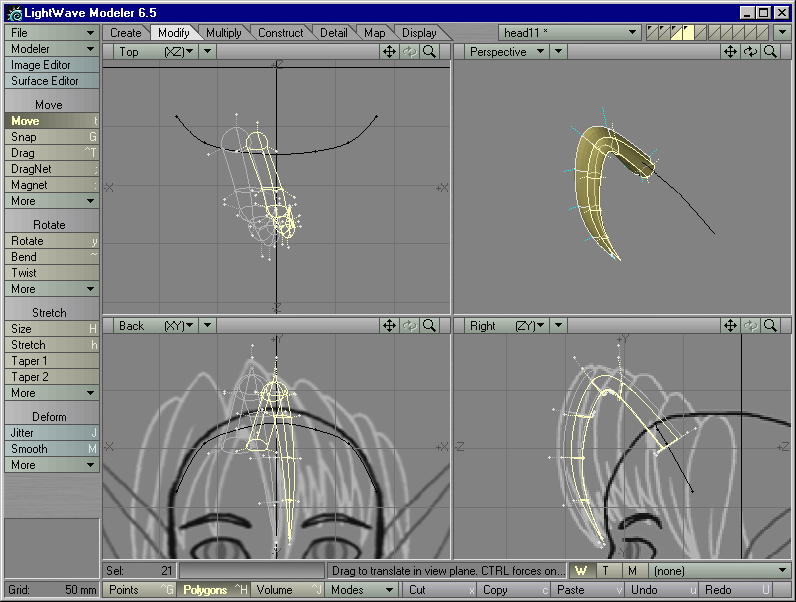
Figure 9 |
STEP 14: The model sheet shows pairs of hair tufts. Select all geometry. Copy and Paste it into the same layer; move and rotate the selected original to the side. Make sure that it, too, intersects the spline guide for the hairline in the background layer. Use the Size tool to shrink it slightly. Then deselect the tip of the geometry, and use a negative Smooth Scale (about --5mm or --6mm) to thin the shape of the hair tuft. It should look like Figure 9. (Remember that the more the two tufts intersect, the less of an ink line that you will see between them. With that in mind, pick the style you like best).
STEP 15: Select all geometry. Copy and Paste it into the same
layer, then Move, Rotate, and Size the original until it looks like Figure
10. Make sure that the base of the selected geometry intersects
the spline guide in the background -- you want it to intersect the hairline
of the head in the future.
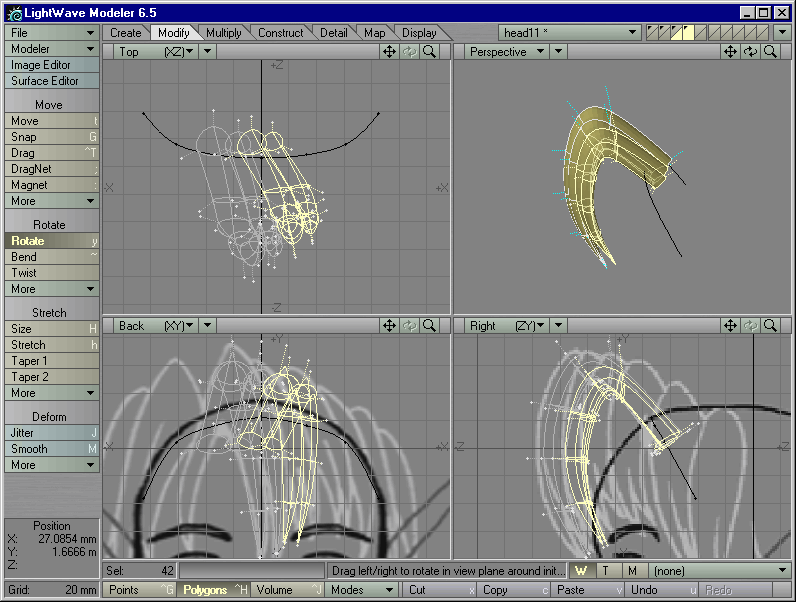
Figure 10 |
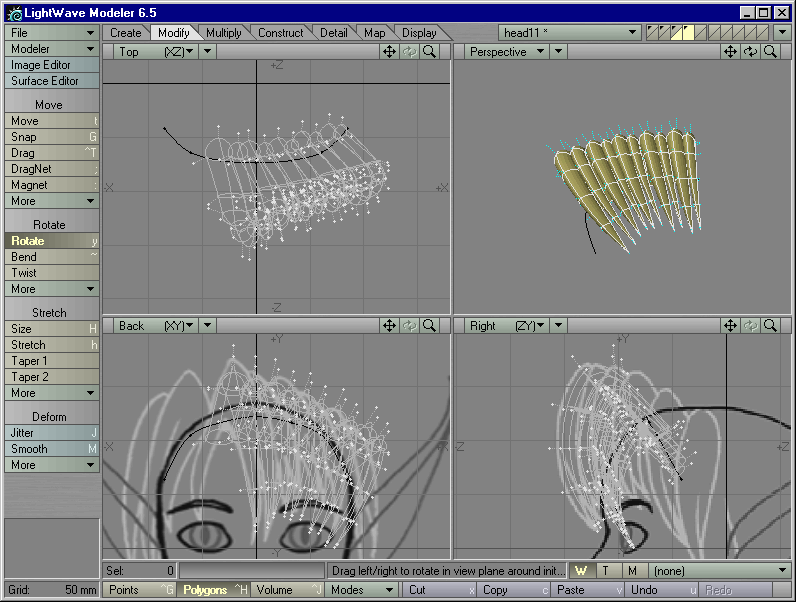
Figure 11 |
STEP 16: Repeat the last step until you have hair tufts covering
the entire side of the head. . When finished, it should look something
like
Figure 11.
Make sure that the base of every tuft intersects the spline guide in the
background, as though you were threading them on a string. For now, worry
about how the base of each hair tuft looks -- you will tweak the tips in
the next step.
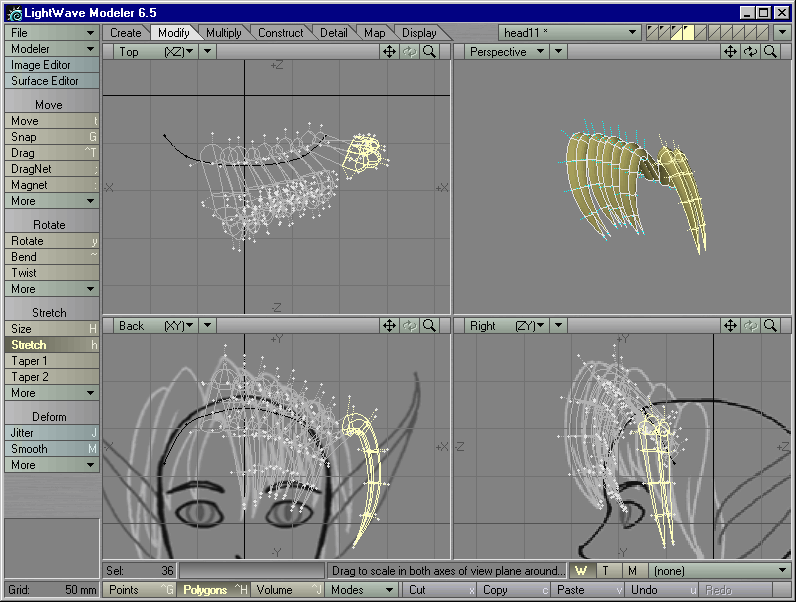
Figure 12 |
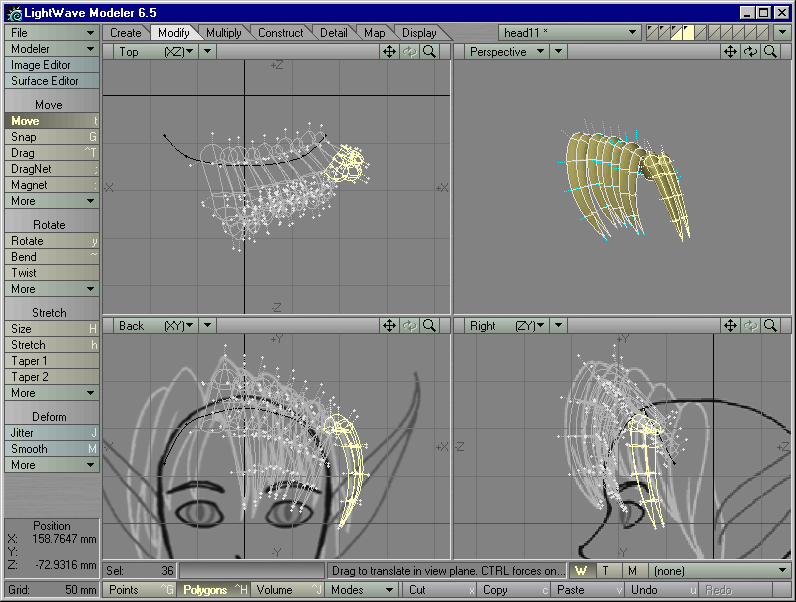
Figure 13 |
STEP 17: Select the outermost pair of hair tufts (Tip: select their tips in the Back View, then type ] to Select Connected geometry). Deselect their base polygons, so that they will keep intersecting with the spline guide no matter what we do to the rest of the geometry. (Figure 12) (Tip: if you can't reach the base polygons easily, use the Polygon Statistics panel to deselect all geometry that falls under the part name of "Kara Bangs (Base)"). Use the Rotate, Move and Stretch tools to both lengthen and spread these hair tufts away from the face, so that they look like Figure 13.
STEP 18: Repeat the step for the other hair tufts, until they
look like
Figure 14.
Make sure that the non-base sections of the hair tufts form a nice arc
in the Top View.
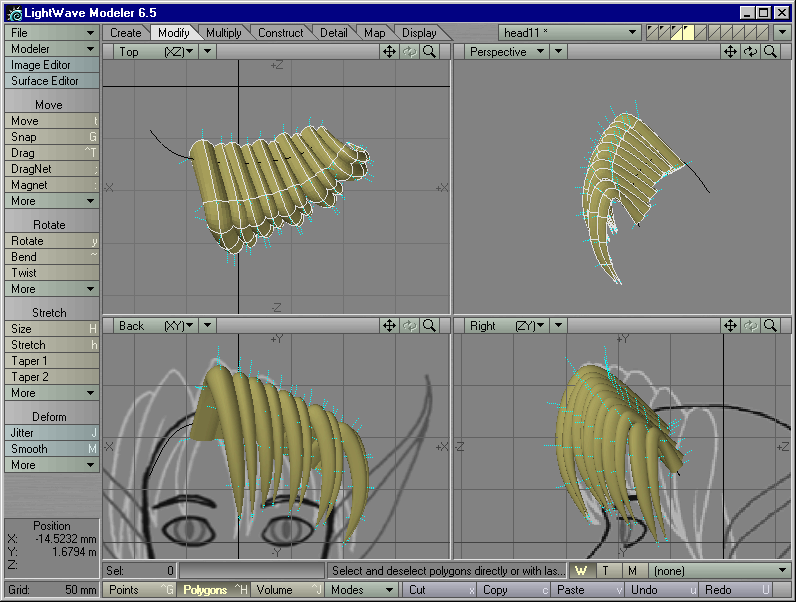
Figure 14 |

Figure 15 |
STEP 19: Let's extend some of that arc to the front view. In the Top View, select all of the base sections of the hair tufts; type = to Hide all unselected geometry. Then, in the Top View, select all of the points that lie on the borders between the base geometry and the (hidden) tuft geometry -- the points at the apex of each hair tuft. With those points still selected, type the backslash key ("\") to Unhide all hidden geometry.
STEP 20: Activate the Shear tool, and (in the Top and Right View), draw the falloff shape from end to end of those selected points that you want to raise into a more arc shape. Tap the right arrow key on your keyboard to choose the shape whose upper edge best matches the arc of the hair in the Back View. Then, in the Back View, left-click and drag up to push the points into more of an arc. (You might want to have the display type of the Back View set to Smooth Shade for a better idea of the shape of the hair in the Back View). (Figure 15)
Note: "Shear" is basically the Move tool with falloff. With this tool, you can move entire groups of points into soft, rounded shapes more quickly than you could by moving them point-by-point with the Move tool.Always use the fastest tool that gives you the results that you want.
STEP 21: Use a copy of the two outermost hair tufts to add two
more hair tufts, as seen in Figure
16. Rotate, Stretch and Move it until it looks "right" to
you. You may want to make the head geometry an additional foreground layer,
so that you can make sure the base of these new hair tufts intersect the
head at the hairline.
Figure 16 |
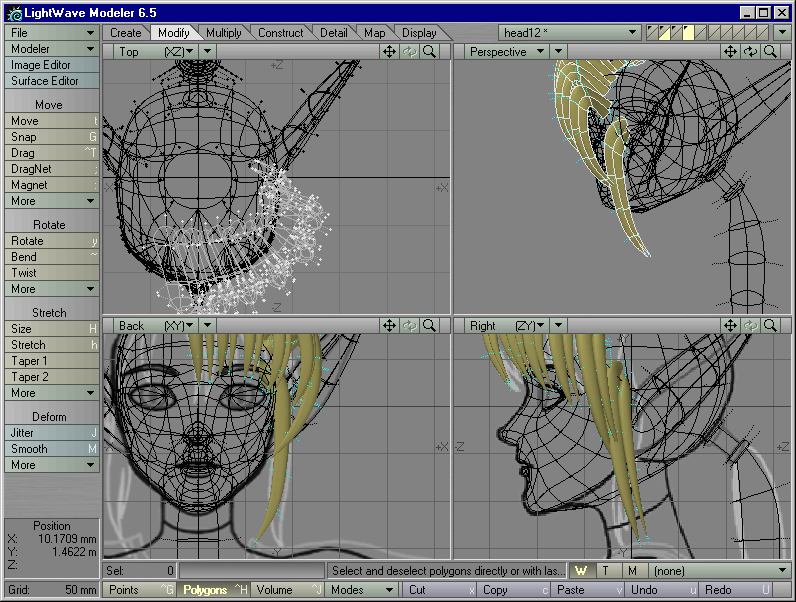
Figure 17 |
STEP 22: Use a copy of the hair tufts you created in the last step to create the hair tuft that hangs down in front of the ear, as shown in Figure 17.
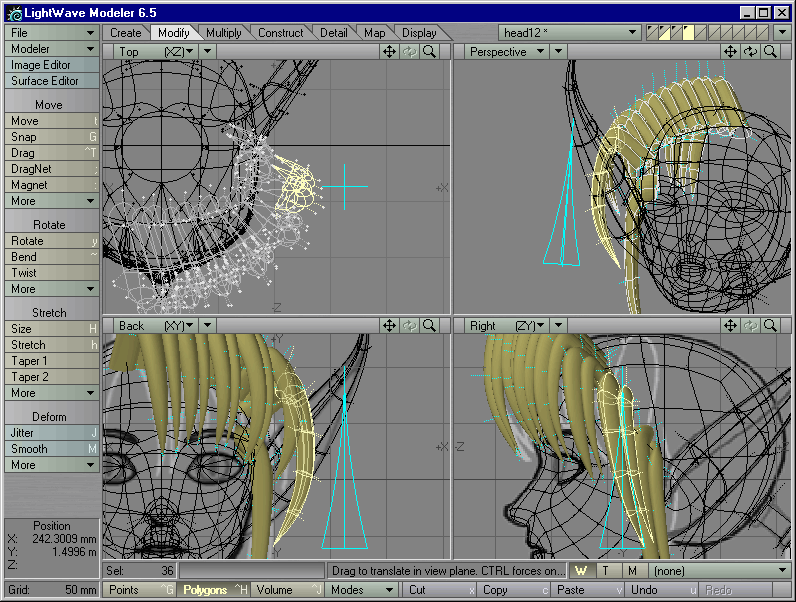
Figure 18
STEP 23: If any of the the hair tufts you created in previous steps intersect with these new hair tufts, select the non-base sections of those tufts and Shear them out of the way in the Back View. (Figure 18)
STEP 24: Deselect everything. In the Top View, select all of
the outermost tufts that do not appear to have a counterpart on the other
side of the X axis. Type Shift-v and Mirror these tufts across 0m on the
X axis. Leave Merge Points unchecked (the chances of points overlapping
here are slim, but you never know). (Figure
19)
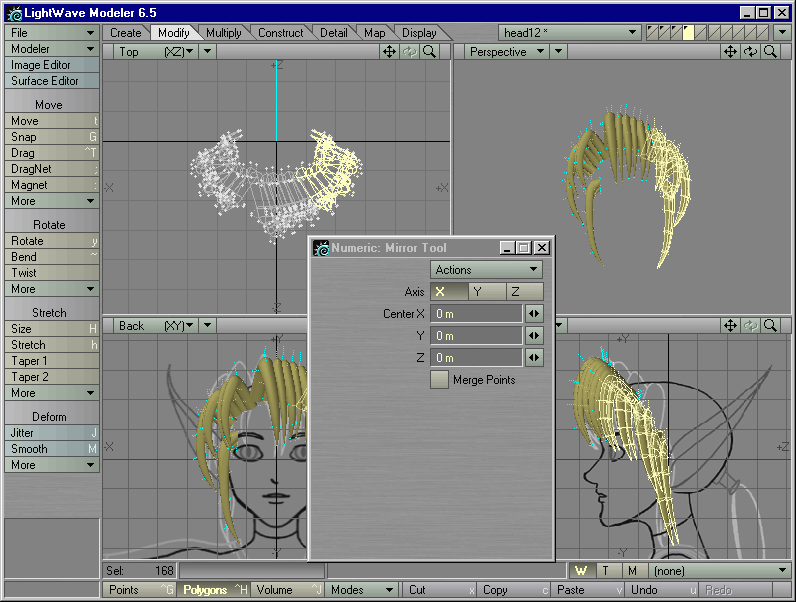
Figure 19 |
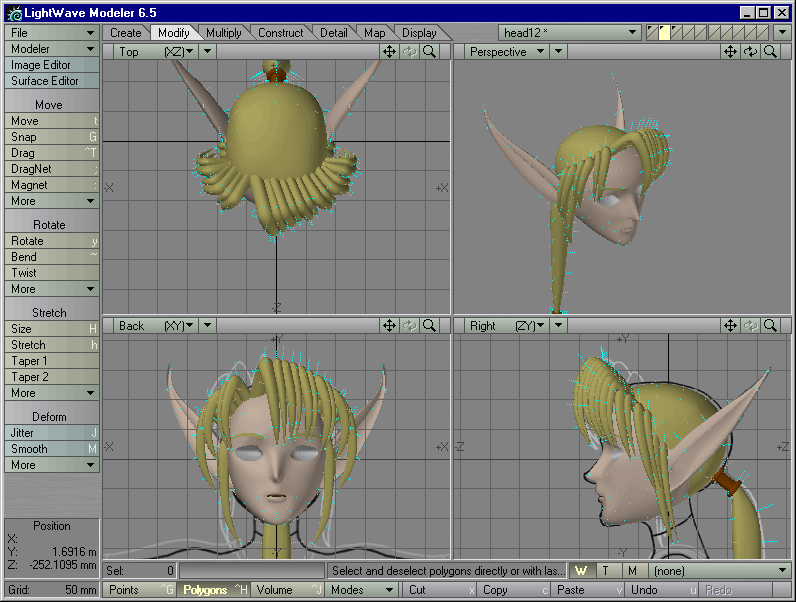
Figure 20 |
STEP 25: Deselect everything. Cut and Paste all the bangs geometry out of this layer and into the head layer. It should look like Figure 20.
STEP 26: Save this object as head12.lwo.