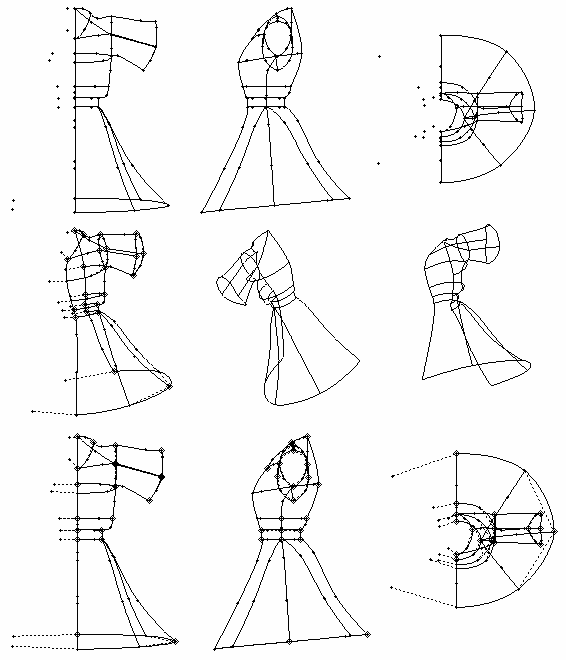
Figure 1 contains a visual overview of the spline cage that we will create for the tunic. Because of their similar shapes, we can use a distorted copy of the upper half of the torso spline cage to create the upper half of the tunic spline cage.
Note: This section of the tutorial assumes that you already know how to select, copy, paste, Add Points to a spline, create splines, use the Move tool, use the Stretch tool, use the Drag tool, and Patch splines. If you do not yet know these tools, please review the spline patching tutorials from the CD-ROM and the torso modeling tutorial.
STEP 1: Load torso18.lwo into Modeler. (If you had deleted the original spline cage long ago without saving it, you may load torso18.lwo off the CD-ROM).
STEP 2: Find the layer containing the spline cage for the torso.
Select all splines that form the upper left half of the torso. Copy these
splines, then paste them into a new empty layer. It should look like Figure
2.

Figure 2 |

Figure 3 |
STEP 3: Select the four splines that form a circle at the stump of the arm. Use the Drag tool to distort them into the wide, flared sleeve edge defined on the model sheet. (Figure 3)
STEP 4: Deselect everything. Select the four splines that form
an oval at the armpit. Move them so that their lowest point touches the
armpit of the ink lines that describe the tunic on the model sheet in the
Back View. Then Stretch them until their topmost point touches the
shoulder of the tunic ink lines on the model sheet in the Back View. Finally,
use the Drag tool to distort the splines in the Right View until they fit
the smaller of the tunic arm ellipses on the model sheet. (Figure
4)

Figure 4 |

Figure 5 |
STEP 5: Deselect everything. In the Back View, select the top and bottom splines that connect the two arm circles. Use the Drag tool to make these splines fit the ink lines defining the tunic on the model sheet in the Back View. (Figure 5)
STEP 6: Deselect everything. In the Back View, select the spline
that defines the left side of the body. Use the Drag tool and the Ctrl
key to move each of its centermost three points in the Back View, straight
across on the X axis, until each point touches the ink line defining the
left side of the tunic on the model sheet. (Figure
6)

Figure 6 |

Figure 7 |
STEP 7: Deselect everything. In the Right View, select the splines that define the front and back of the body. Use the Drag tool and the Ctrl key to move each of their three centermost points on the Z axis until each touches the closest ink line defining the tunic on the model sheet. (Figure 7)
STEP 8: Deselect everything. Select the lowest two splines of
the cage, the splines that define its waist. Use the Move tool and the
Ctrl key to move these two splines up on the Y axis, until they touch the
top of the belt. (Figure
8)

Figure 8 |

Figure 9 |
STEP 9: Deselect everything. Select the splines that define the top and sides of the neck. You don't need these five splines -- so Cut them out of the model. (Figure 9)
STEP 10: Select the two splines that define the "collar" of the
neck. Use the Drag tool to distort it to fit the shape of the collar of
the tunic on the model sheet in the Back View and in the Right View. (Figure
10)

Figure 10 |

Figure 11 |
Note: At the bottom of the screen, you'll see a "Modes" drop-down list. In that list, you'll find "Symmetry On/Off." Selecting it will toggle Symmetry Mode on/off. If this spline cage is in any way symmetrical, Symmetry Mode will help you keep it symmetrical. (Moving a point to the left, for example, will move its counterpart to the right).
STEP 11: Deselect everything. Select the shoulder spline again. In the Back View, use the Drag tool to make it fit the ink line of the shoulder of the tunic in the model sheet. (Figure 11)
STEP 12: Deselect everything. Select the two "rib splines." Drag
those points that you had not yet touched (the two points surrounding the
center point of each spline) until they look rounded in the Top View. Use
the Ctrl key to help you restrict movement to one axis. (Figure
12)
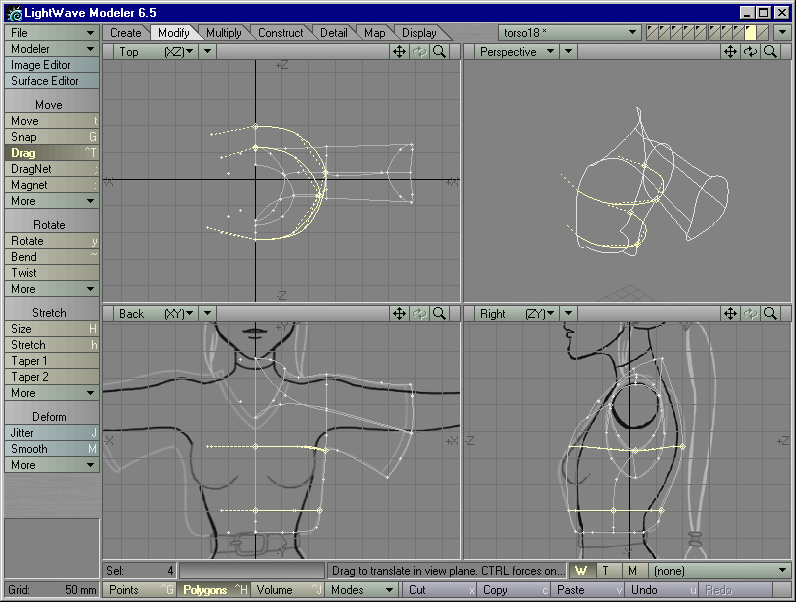
Figure 12 |
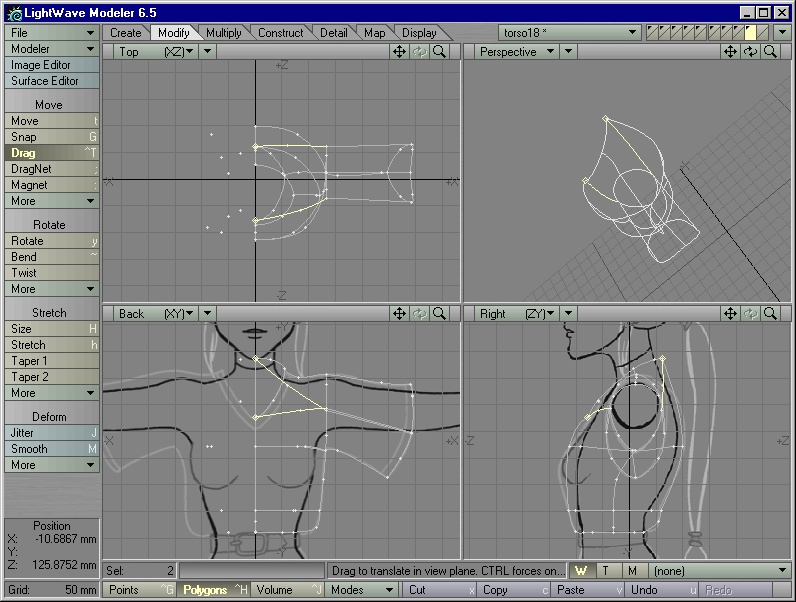
Figure 13 |
STEP 13: Deselect everything. Select the front and back "shoulder splines." Right now they're caving into the chest and pinching at the collar. Drag their points until they look like Figure 13.
Well, that's it for the top of the cage. She still needs a belt and
a skirt, though.
| Table of Contents | Next Page |