Figure 1

Figure 2
Time to call on our good friends Knife, Stretch and Smooth Shift.
STEP 1: Load torso14.lwo into Modeler (if you did not follow the previous tutorial sections and just want to practice adding detail with Knife and Smooth Shift, you may load torso14.lwo off the CD-ROM). Go to the layer that contains the body, and zoom in on the area of the model sheet that contains the end of the left glove.
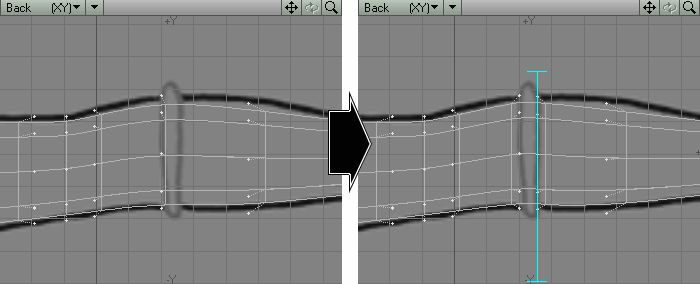
STEP 2: In the Back View, we already have a row of points bordering
the left side of the piping on the model sheet. Let's add a row of points
that borders the right side as well. Type Shift-k to activate the Knife
tool. In the Back View, slice through the arm as shown in Figure
1. For this cut, worry about where the points lie, and not
where the line defining the end of the section appears to be.
|
Figure 1 |
Figure 2 |
That said, the volume of the forearm could use some tweaking. Since no more geometry (outside of the piping) will be added to this forearm, we can now tweak the points with an eye towards the lines that define the SubPatches.
STEP 3: In the Back View, select the points shown in Figure 2. Type h to activate the Stretch tool, and Stretch them up until the top "line" of the SubPatch surfaces touches the black line that defines the top of the forearm in the model sheet.
STEP 4: Deselect everything. Select the ring of polygons that
lie in the two rows of points that border the piping of the model sheet.
Assign the preexisting "Kara Glove Trim" surface to these polygons. Leave
them selected. (Figure 3)
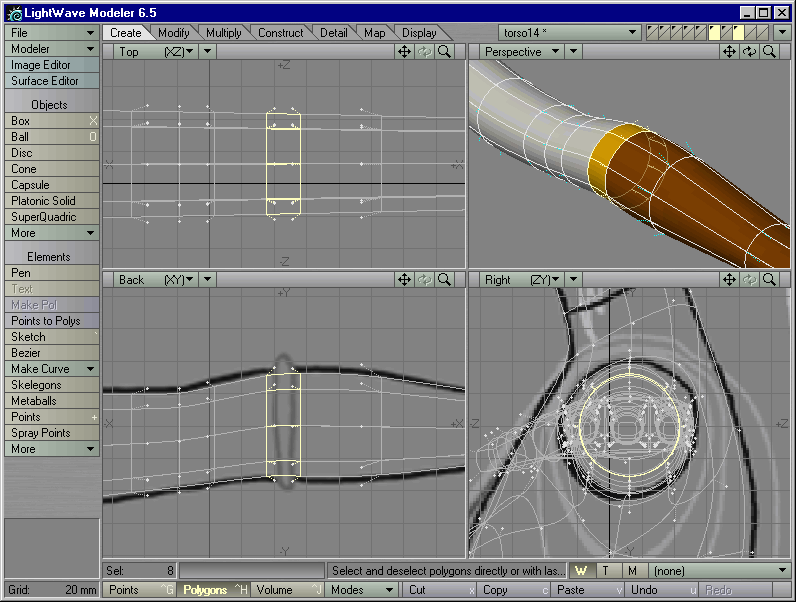
Figure 3 |
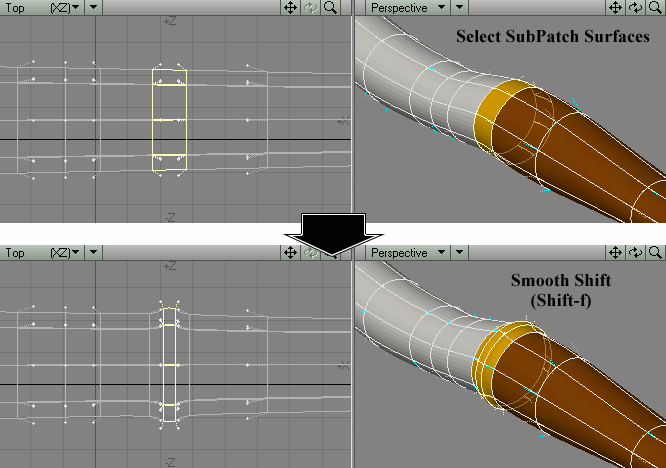
Figure 4 |
STEP 5: Type Shift-f to activate the Smooth Shift tool. Left-click on this selected ring of polygons and drag to the right slightly. (Figure 4) Deactivate the Smooth Shift tool.
STEP 6: Hold down the Shift key and hold down the right mouse button to Lasso all of the polygons you created with Smooth Shift in the last step. You should have 24 polygons selected. Type x to Cut these polygons out of the mesh and into memory. Then type v to Paste them back into this layer. Because this ring of polygons is now a separate mesh, it has no curve where it meets the arm, forming a tight seam. Because the points of the trim lie right on top of the points that form the edges of the "gap" in the arm, you cannot see any gaps between the glove and its trim. (Figure 5)
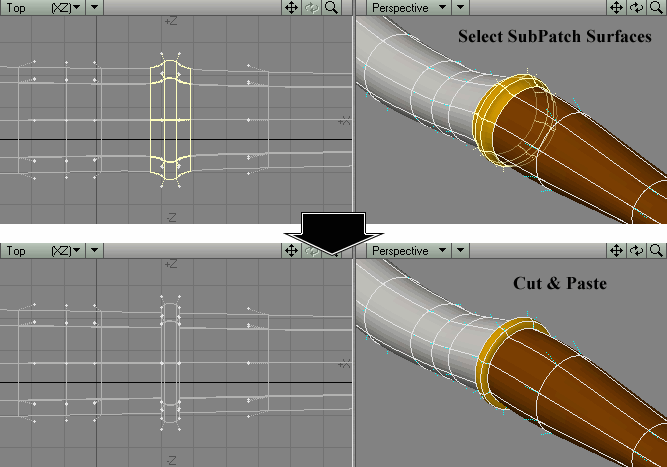
Figure 5
STEP 7: Select the 24 polygons that form the piping again. Activate Display > Selection > Grouping > Change Part Name. Type in the Name of "Separate Mesh" and click on OK.
Now you can select this particular group of polygons at any time by using the Parts drop-down list in the Polygon Statistics panel. Typing "w" when in Polygon Selection Mode will bring up this panel. When in this panel, right-click on "Part" and select the Part Name that you want to select/deselect. Then left-click on the plus or minus signs to the left of "Part" to select or deselect all polygons that carry this Part Name.
Note: If you ever use Merge Points on the entire arm by accident, you can quickly select the polygons that you need to Cut and Paste by selecting all polygons that have the Part Name of "Separate Mesh."
STEP 8: Save this object as torso15.lwo.