Figure 26
STEP 37: If the hand looks like it's the wrong size or in the wrong position in relation to the body, select its polygons and Move and Size it to your taste.
STEP 38: If it looks good to you, go to the layer that contains the hand object. Deselect everything. Type c to Copy its geometry. Go to the body layer and type v to Paste a copy of the hand geometry into the same layer.
STEP 39: Hit the Tab key to turn everything back into faces, to make the geometry easier to see (and thus, easier to manipulate).
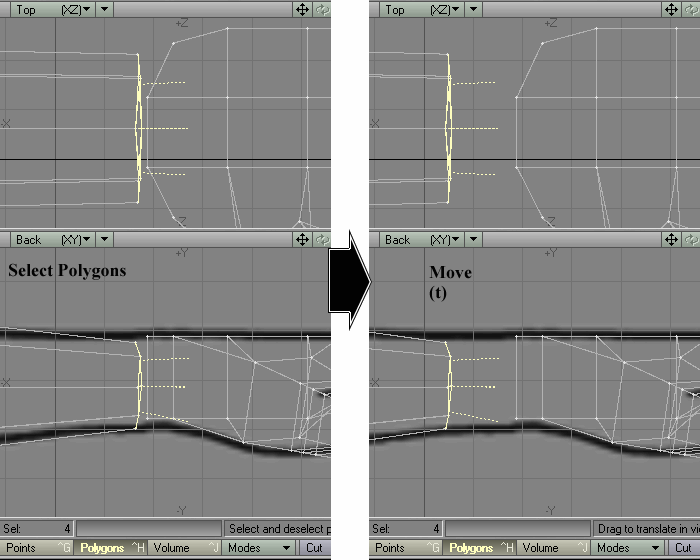
STEP 40: Select the polygons at the stump of the arm, and Move them back slightly, to put some distance between them and the hand. (Figure 26)
Figure 26
STEP 41: Leaving them selected, type the equal sign key ("=")
to Hide all unselected geometry. (Figure
27)
Figure 27 |
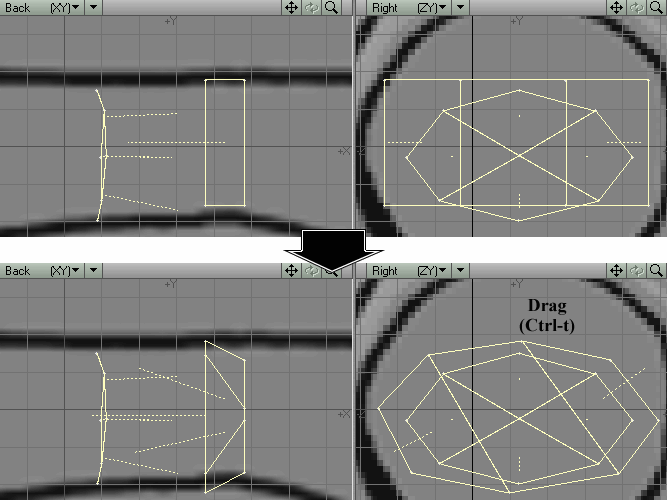
Figure 28 |
STEP 42: Leaving them selected, use the Drag tool in the Right View to get the points of the stump of the left hand to match the shape of the points of the stump of the left arm. (Figure 28)
STEP 43: (Still) leaving them selected, type Shift-z to Merge
them into two (weird-looking) polygons. Don't worry about the aesthetics
of these (weird-looking!) polygons -- they are merely the means to an end.
(Figure 29)
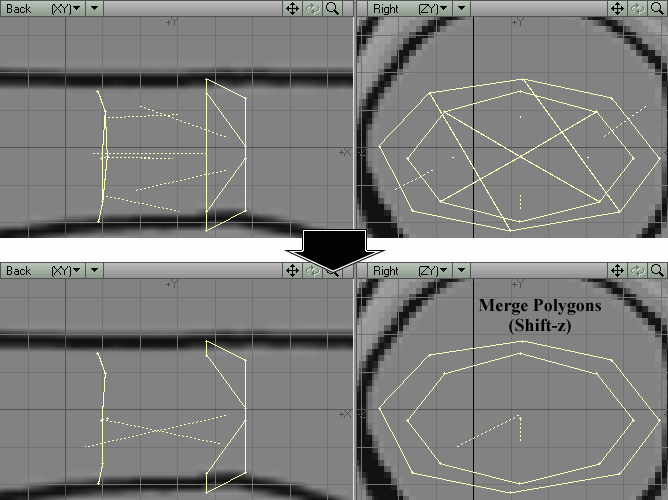
Figure 29 |
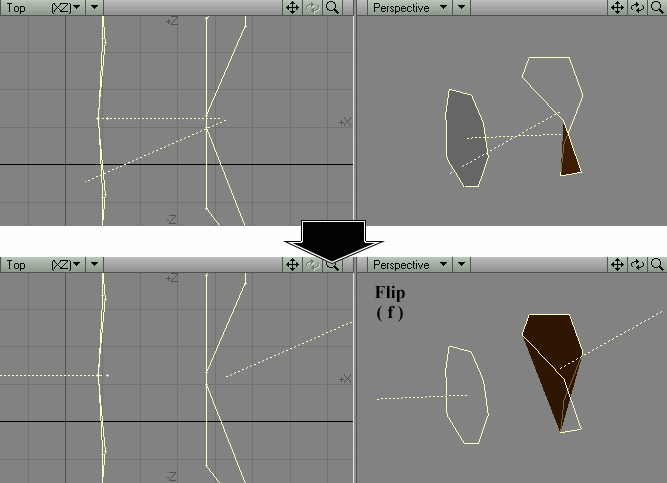
Figure 30 |
STEP 44: Leaving these polygons selected, type f to Flip them to face away from each other. (Figure 30)
STEP 45: (Still!) leaving them selected, activate Create Skin from Multiply > Extend > More > Create Skin. (Figure 31)
About Create Skin: Create Skin will do its best to connect two polygons with triangles, but a literal-minded computer can only do so much. By moving the points of the stump of the left hand into the shape of the points of the stump of the left arm in Step 42, you helped Create Skin figure out which points are supposed to be connected to each other.
STEP 46: The weird-looking polygons should still be selected.
You don't need them anymore, so type x to Cut out the still-selected, weird-looking
polygons, leaving the newly created geometry behind.
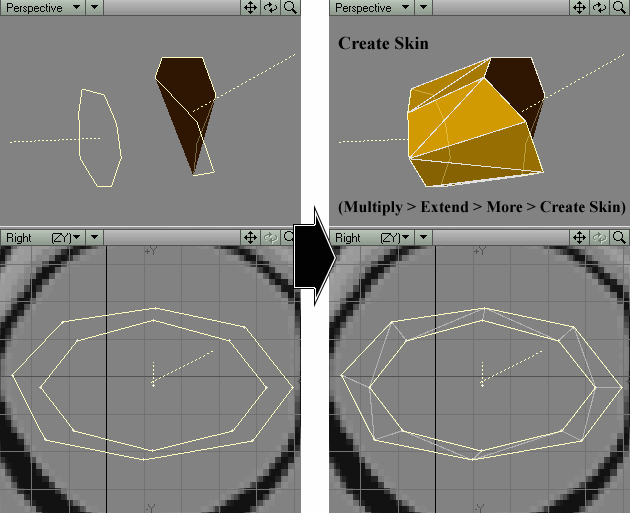
Figure 31 |

Figure 32 |
STEP 47: In the Perspective View, select two adjacent triangles, type Shift-z to Merge them into a single quad polygon, and deselect them. Do this to the rest of the adjacent triangles, one pair at a time, until you have something that looks like Figure 32.
STEP 48: Deselect everything. In Points Selection Mode, type
w to bring up Point Statistics. (Figure
33) Click on the plus sign next to "0 Polygons" to select
that one leftover point from the center of the arm stump, the point that
doesn't belong to any polygons anymore. Put it out of its misery by typing
x to Cut it out of existence.
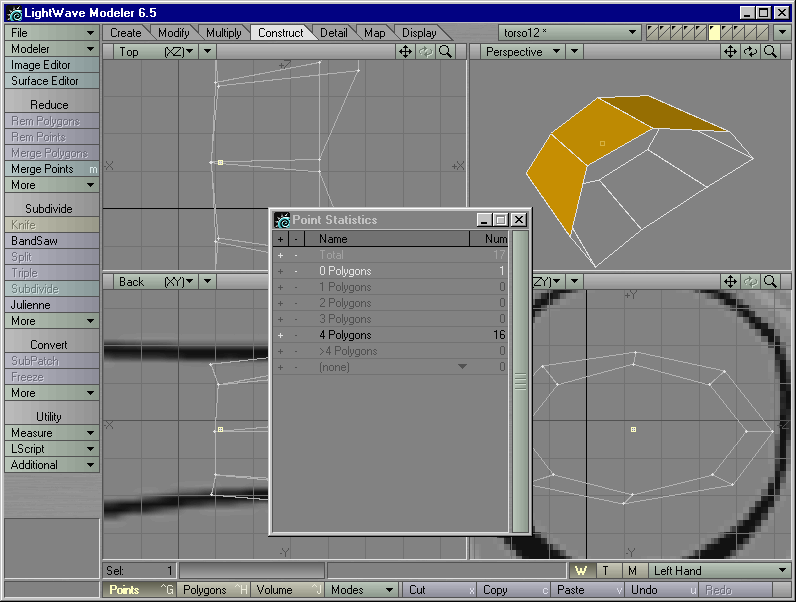
Figure 33 |
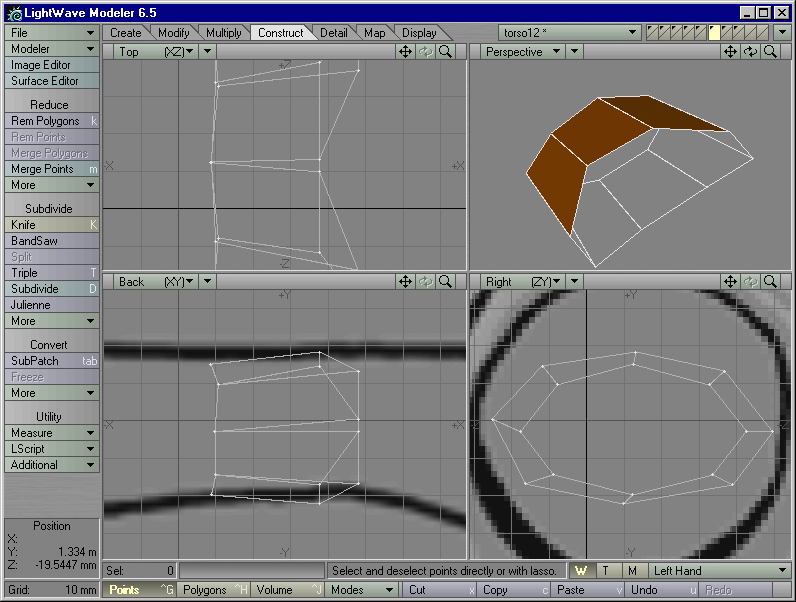
Figure 34 |
STEP 49: Type q to bring up Change Surface. You already have a surface named "Kara Glove." Click on the arrow button next to "Name" to select this surface from a drop-down list, and click on "OK." (Figure 34)
STEP 50: Type the backslash key ("\") to Unhide all geometry. Type the Tab key to see how it looks.
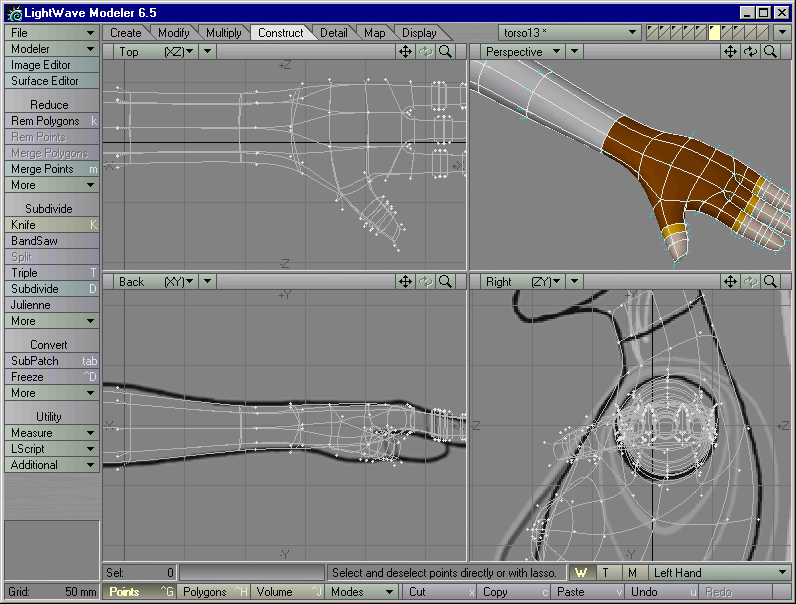
Figure 35
STEP 51: Not bad. (Figure
35) Save this object as torso13.lwo.
| Previous Page | Table of Contents |