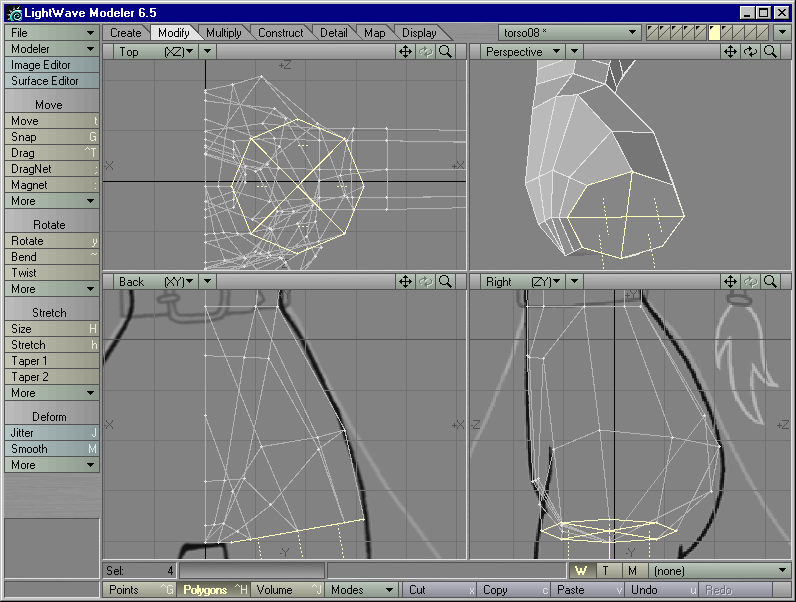
Figure 1
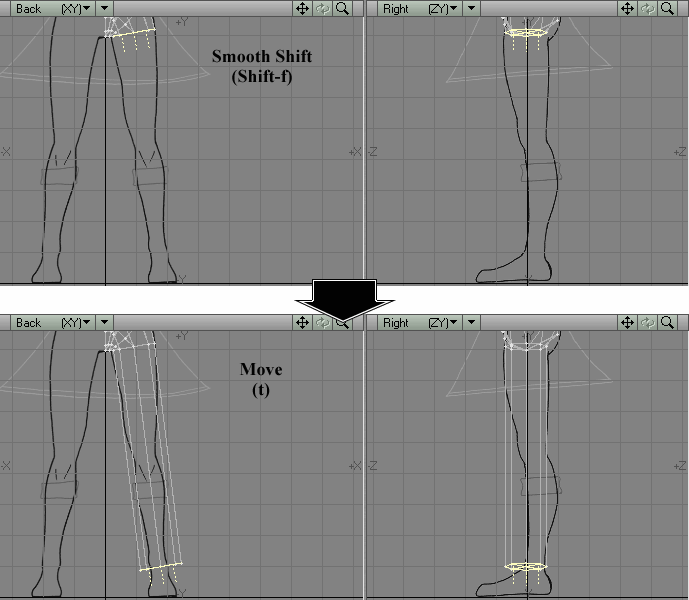
Figure 2
STEP 2: Set the Perspective View to Wireframe Shade.
STEP 3: It's hard to see where the stump of the leg ends in SubPatch mode. Make sure everything is deselected, and hit the Tab key on your keyboard to convert everything back into Faces.
STEP 4: Select the four polygons that form the stump of the leg.
(Figure 1)
|
Figure 1 |
Figure 2 |
STEP 5: Type Shift-f to activate Smooth Shift. Right-click on the selected geometry once to create additional geometry. Type t to activate the Move tool. In the Back View, Move the selected polygons down until they touch the ankle on the model sheet. (Figure 2)
STEP 6: With the polygons still selected, type Shift-h to activate
the Size tool. In the Right View, move your mouse pointer over the selected
polygons. Left-click and drag to the left until the edges of the selected
polygons touch the black lines of the model sheet. (Figure
3)
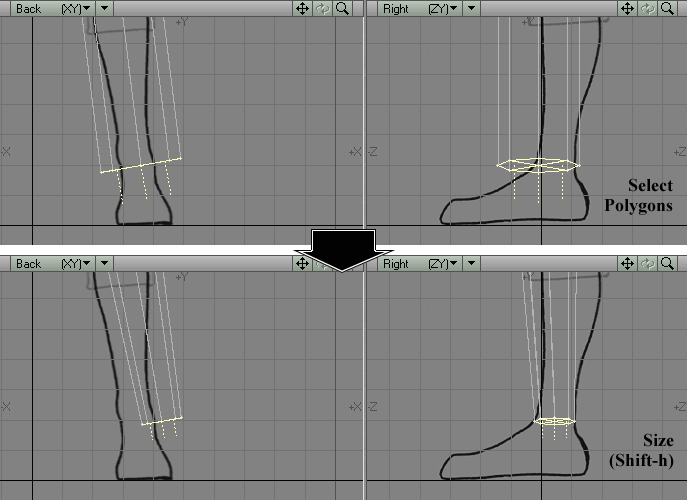
Figure 3 |
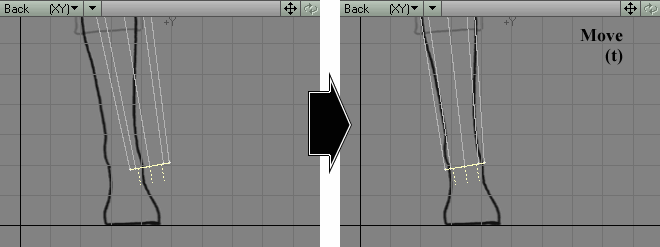
Figure 4 |
STEP 7: Type t to activate the Move tool. In the Back view, move the still-selected polygons into place, so that their edges lie closer to the black lines of the model sheet. (Figure 4)
STEP 8: Might as well start working on this in SubPatch mode again. Deselect everything. Hit the Tab key to convert all faces into SubPatch surfaces.
STEP 9: Type Shift-k to activate the Knife tool. In the Back
View, make four slices into this leg -- one at the knee, one in the center
of the upper leg, and one in the center of the lower leg. When you make
your cuts, try to mimic the slight angle of the points of the ankle. (Figure
5)
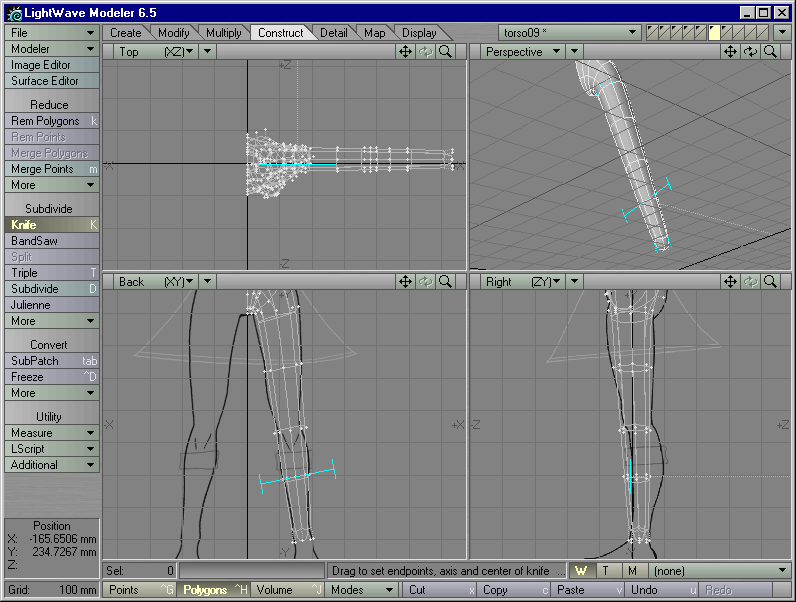
Figure 5 |
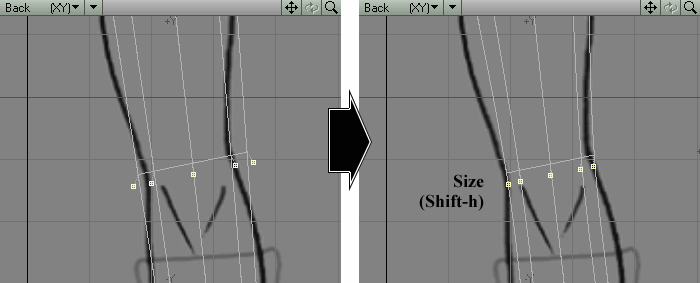
Figure 6 |
STEP 10: Select the circle of points around the knee. Type Shift-h to activate the Size tool. In the Back View, move your mouse pointer over the selected points; left-click and drag to the left until they fit within the black lines of the model sheet. (Figure 6)
STEP 11: In the Right View, use the Move tool to move these points
back until they lie within the black lines of the model sheet. (Figure
7)
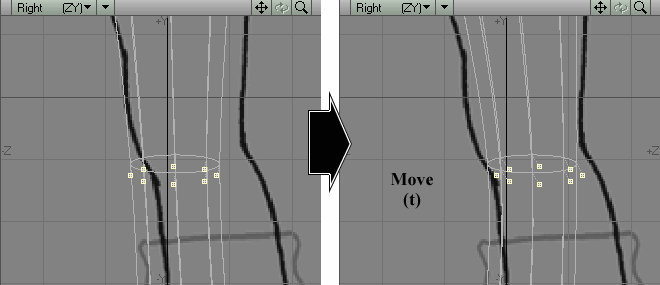
Figure 7 |
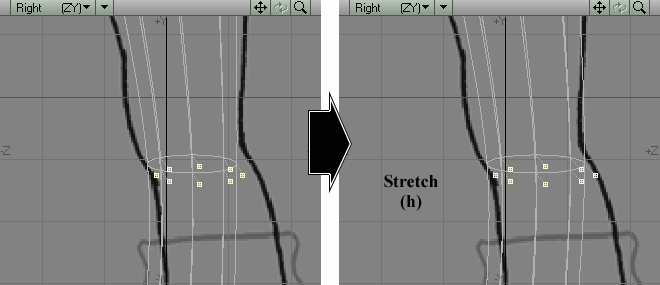
Figure 8 |
STEP 12: Type h to activate the Stretch tool. Use the Stretch tool in the Right View to stretch the points to fit the black lines of the model sheet. (Figure 8)
STEP 13: Select the eight points in the center of the lower leg.
In the Right View, use the Move and Stretch tools to get them to fit the
black lines of the model sheet. (Figure
9)
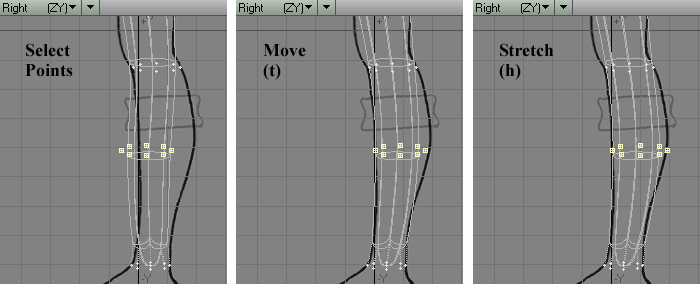
Figure 9 |
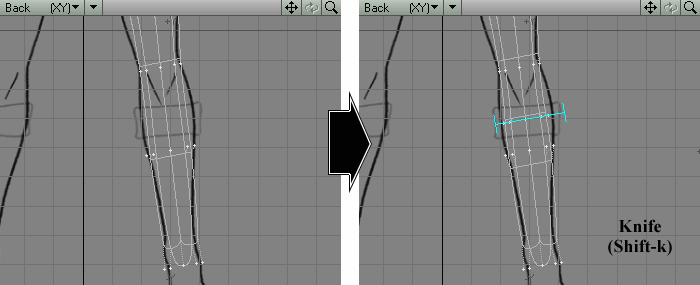
Figure 10 |
STEP 14: Deselect everything. In the Back View, use the Knife tool to slice through the middle of the lines in the model sheet defining the boot's top. Keep the cut at an angle, though, to match the angle of all the other cuts. (Figure 10)
STEP 15: Select the points you have just created with this Knife
cut. In the Back and Right Views, use the Stretch tool to get these points
to touch the black lines of the model sheet. (Figure
11)
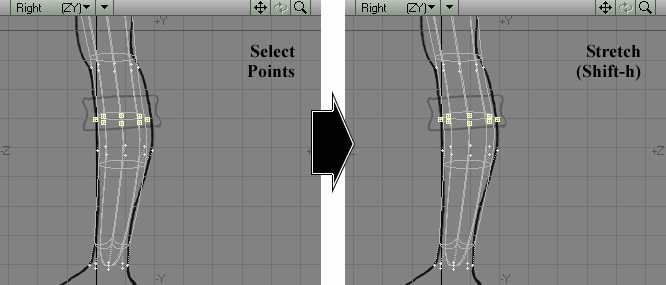
Figure 11 |
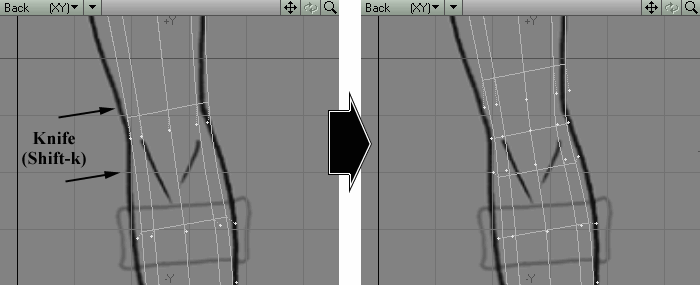
Figure 12 |
Note: Notice that the closer the points lie to each other, the closer the SubPatch surface gets to the points. This is why the emphasis in these early stages is to get the points to touch the ink lines of the model sheet, instead of making the edges of the SubPatch surfaces touch the ink lines.
STEP 16: Like the elbow of the arm, this knee also needs extra geometry to help it keep its volume when bent. Deselect everything. In the Back View, use the Knife tool to make two slices, one on either side of the circle of points around the knee. (Figure 12)
STEP 17: You need to adjust these new points so that they, too,
touch the ink lines of the model sheet. Select the row of points above
the knee. Use the Move tool in both the Back and Right Views to get these
points to touch the black ink lines of the model sheet. (Figure
13)
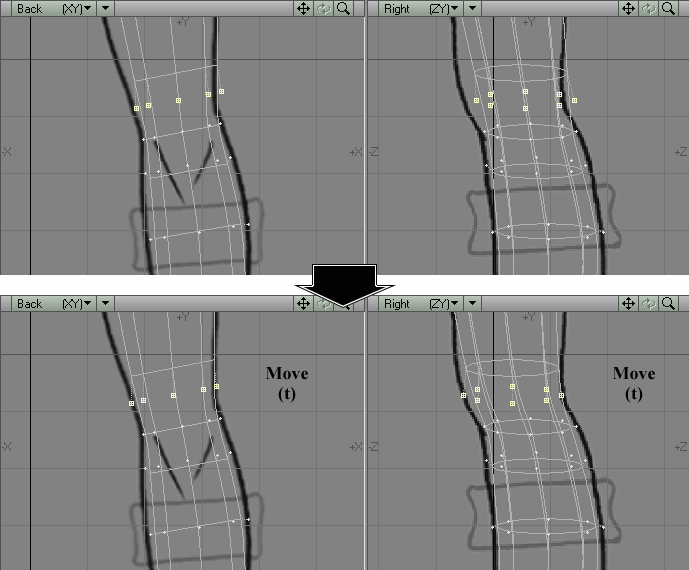
Figure 13 |

Figure 14 |
STEP 18: Deselect everything. Select the row of points below the knee. Use the Stretch tool in both the Back and Right Views to get these points to touch the black ink lines of the model sheet. (Figure 14)
STEP 19: Deselect everything. Select the points in the center
of the thigh. In the Right View, use the Stretch tool to get these points
to touch the black ink lines of the model sheet. (Figure
15)
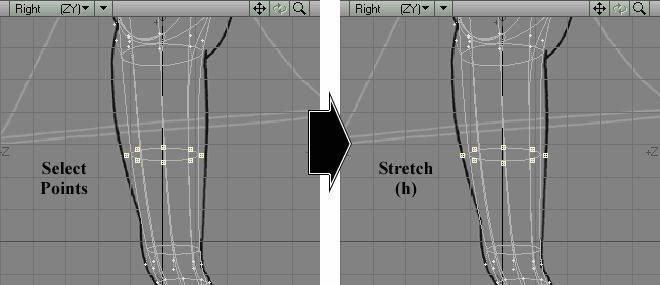
Figure 15 |
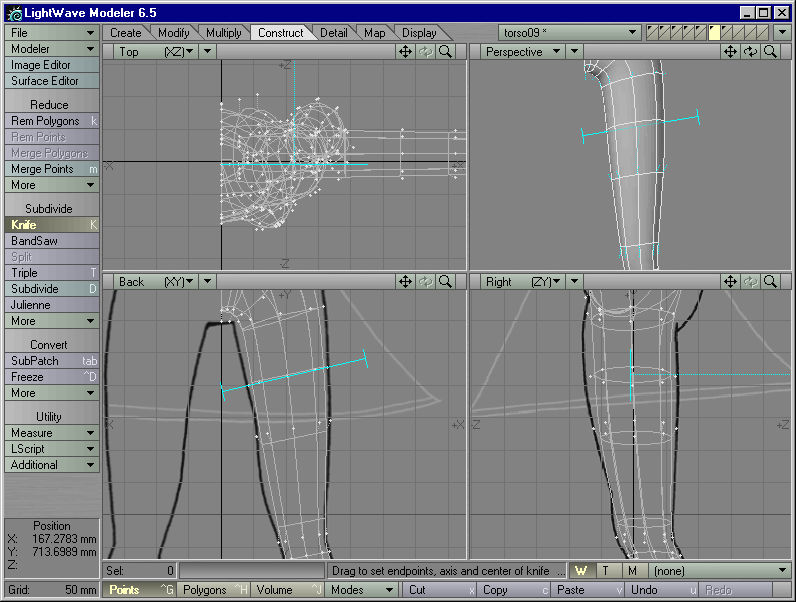
Figure 16 |
STEP 20: Deselect everything. Use the Knife tool to make a cut in the polygons above the center of the thigh. (Figure 16)
STEP 21: Select the points you just created with this cut, and use the Stretch tool to make them fit the black lines of the model sheet.
STEP 22: Deselect everything. Use the Knife tool to make a cut
in the polygons below the center of the thigh. (Figure
17)
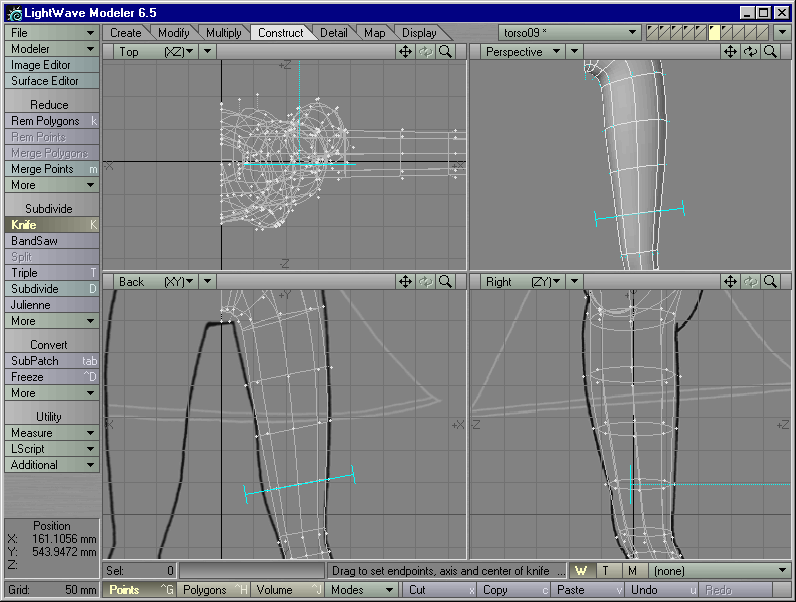
Figure 17 |
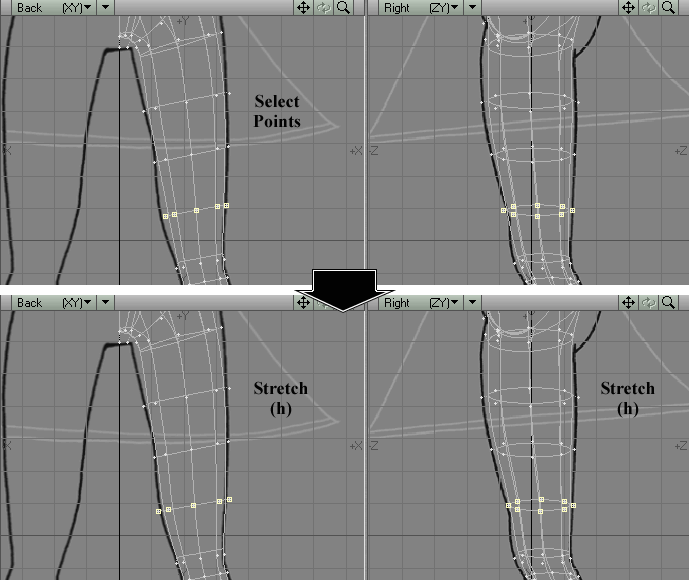
Figure 18 |
STEP 23: Select the points you just created with this cut. Use the Stretch tool to make them fit the black lines of the model sheet. (Figure 18)
STEP 24: That's it for the leg right now. Save this object as torso09.lwo.